
You’re about to start a live stream, record a YouTube Short, or use voice search, and your microphone stays silent. The voice search icon is crossed out, your audience hears nothing, or the recording indicator never shows sound input.
YouTube microphone failures typically stem from three core issues: blocked browser permissions preventing YouTube from accessing your mic, system-level privacy settings restricting audio input, or incorrect device selection inside YouTube Studio or your streaming software. You can restore microphone functionality by enabling site-specific permissions in Chrome/Safari settings, granting microphone access in Windows/Mac privacy controls, selecting the correct input device, and clearing browser cache or disabling conflicting extensions.
Every minute your mic stays offline costs you viewers, engagement, and credibility. This guide walks you through eight proven fixes, organized by frequency and impact, so you can diagnose the root cause and get back to creating content without audio headaches.
Key Takeaways
- YouTube microphone failures result from three layers: browser permissions blocking access, system-level privacy settings restricting audio, or incorrect device selection in YouTube Studio.
- Enable microphone permissions through your browser’s site settings (Chrome, Firefox, or Safari) by resetting YouTube from blocked to allowed in Privacy or Security preferences.
- Verify system-level microphone access is enabled in Windows Privacy settings or macOS Security & Privacy, then confirm the correct input device is selected and not muted.
- Clear your browser cache and cookies for YouTube specifically, or perform a full cache clear to reset permissions that may be locked in corrupted cache entries.
- Disable conflicting browser extensions like Privacy Badger or uBlock Origin that may override microphone permissions, or test in a new browser profile without extensions.
- If issues persist, update audio drivers via Device Manager on Windows or System Update on Mac, or switch to alternative tools like OBS Studio to bypass browser-based restrictions entirely.
Why Your Microphone Isn’t Working
YouTube microphone failures rarely happen at random. Three layers of software control your mic: browser-level site permissions, operating-system privacy settings, and application-specific device selection. If any single layer blocks access, your audio disappears.
Browser permissions act as the first gatekeeper. When you visit YouTube, Chrome, Safari, or Firefox asks if you want to allow microphone access. Accidentally clicking “Block” or dismissing the prompt leaves YouTube locked out, even if your mic works perfectly in other apps. This is the most common culprit for crossed-out voice search icons and silent live streams.
System-level settings add a second barrier. Windows Privacy and macOS System Preferences control which apps can use your microphone at all. If Chrome is blocked in Windows Privacy settings, no website, including YouTube, can capture audio through that browser. Mobile users face similar restrictions on iOS and Android, where app-level permissions must be granted in Settings.
Device selection errors create confusion when you have multiple mics connected. Bluetooth headsets, USB mics, webcam mics, and built-in laptop mics all register as separate devices. YouTube Studio and OBS default to your system’s default input. If that default points to a disconnected or muted device, you’ll see activity indicators but hear silence. Hardware mute switches on physical mics compound the problem, software shows the mic active, but the toggle stays off.
Check Your Browser Permissions
How to Enable Microphone Permissions in Chrome
Open Chrome and navigate to chrome://settings/content/microphone. You’ll see two lists: sites allowed to use your mic and sites blocked from access. If YouTube appears under the blocked list, click the trash icon to remove it. Refresh YouTube and click the microphone icon again, Chrome will prompt you to allow access.
Alternatively, click the padlock or “View site information” icon in the address bar while on YouTube. Locate the Microphone dropdown and switch it from “Block” to “Allow.” This site-specific method works instantly without reloading settings pages. The change applies immediately: refresh the page and test voice search or start a new live stream.
For YouTube Studio live streaming, the permission flow happens when you click “Go Live” and select your microphone. If no popup appears, the permission is already blocked. Use the padlock method to reset it. Chrome remembers your choice, so you only grant permission once per site unless you clear browsing data or reset site settings.
How to Enable Microphone Permissions in Firefox and Safari
In Firefox, click the three-line menu, select Settings, then Privacy & Security. Scroll to Permissions and click the Settings button next to Microphone. Find YouTube in the status list. If it shows “Blocked,” change it to “Allow” and save. Firefox applies changes immediately, no page refresh required.
Safari users should open Preferences (Cmd+,), navigate to Websites, and select Microphone from the sidebar. YouTube.com should appear in the list if you’ve visited it recently. Change the dropdown from “Deny” to “Allow” or “Ask.” If YouTube isn’t listed, visit the site and trigger a microphone action, Safari will prompt you in real time. Safari’s per-site permissions are granular: you can set different rules for YouTube.com versus YouTube Studio.
Mobile Safari on iOS handles permissions through Settings > Safari > Camera & Microphone. Toggle both to “Ask” or “Allow” for all sites. On Android, open Chrome’s app settings, tap Site Settings > Microphone, and ensure YouTube has permission. The YouTube app requires separate permissions granted via Settings > Apps > YouTube > Permissions > Microphone.
Verify System-Level Microphone Settings
Adjusting Microphone Settings on Windows
Press Win+I to open Settings, then select Privacy > Microphone. The top toggle controls global microphone access for all apps. If this is off, no application, browser or desktop, can use your mic. Turn it on, then scroll to “Choose which apps can access your microphone.” Ensure Chrome, Firefox, or Edge appears in the list with the toggle enabled.
Next, right-click the speaker icon in the taskbar and select “Sounds.” Navigate to the Recording tab. Your active microphone should show green bars when you speak. If it’s grayed out or shows no activity, right-click and select “Set as Default Device.” Check the device properties and ensure the volume slider sits at 75–100% and the mute checkbox is unchecked.
Windows sometimes defaults to a disconnected Bluetooth headset or unplugged USB mic. If multiple devices appear in the Recording tab, disable or remove the ones you’re not using. This forces Windows, and your browser, to use the correct mic. Test by speaking: you should see real-time level bars. If levels stay flat, the mic may be muted at the hardware level or require updated drivers (covered in a later section).
Adjusting Microphone Settings on Mac
Open System Preferences > Security & Privacy > Privacy tab. Select Microphone from the left sidebar. You’ll see a list of apps requesting mic access. Check the box next to Chrome, Safari, Firefox, or any browser you use for YouTube. macOS requires this permission even if the browser itself has site permissions enabled, it’s a two-layer system.
To verify your input device, open System Preferences > Sound > Input. Select your preferred microphone from the list. Speak into it and watch the input level meter. If the bars don’t move, the mic is muted, unplugged, or assigned to a different device profile. macOS lists all connected audio devices, including AirPods, USB mics, and the built-in mic. Make sure the correct one is selected and the input volume slider is near maximum.
For Mac users running OBS or other streaming software alongside YouTube Studio, the Mac app itself may capture exclusive mic access. Close OBS, QuickTime, or any recording app, then refresh YouTube Studio. macOS allows one app at a time to claim the microphone unless you use an audio routing tool like Loopback or BlackHole.
Test and Select Correct Device
Open YouTube Studio and start a new live stream or video upload with webcam recording enabled. Click the gear icon or settings menu to access audio input options. YouTube Studio displays a dropdown of all detected microphones. If you see “Default – [Device Name]” or a generic label, your system is routing audio through an unexpected source.
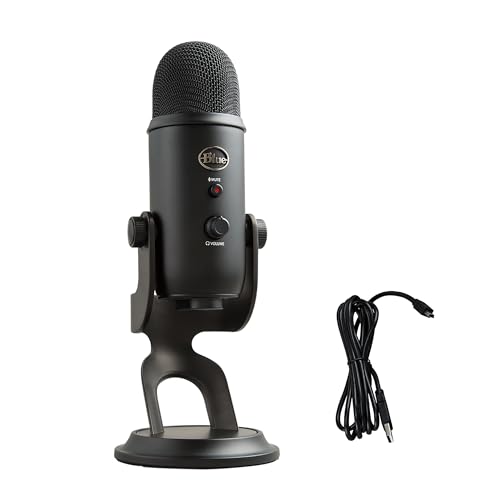
Select each microphone in the list one by one and speak. Watch the audio level indicator, green bars should pulse in sync with your voice. If bars stay gray or pulse without actual sound capture, the device is active but not transmitting. This indicates a driver conflict or hardware mute. For USB microphones like the Blue Yeti or Audio-Technica AT2020USB+, check the physical mute button and gain dial.
OBS users should navigate to Settings > Audio > Mic/Auxiliary Audio and confirm the correct device is selected. OBS and YouTube Studio can conflict if both try to access the same mic simultaneously. Close OBS before launching a YouTube Studio stream, or route your mic through OBS and send the mixed audio to YouTube via RTMP stream key. This avoids double-capture errors.
If no microphone appears in the dropdown, your system doesn’t recognize the hardware. Unplug USB mics, wait five seconds, and reconnect. macOS and Windows should emit a device connection sound. If nothing happens, the cable or USB port may be faulty. Try a different port or test the mic on another computer to rule out hardware failure.
Clear Your Browser Cache
Browser cache stores permission decisions, cookies, and site data. Corrupted cache entries can lock YouTube into an outdated “microphone blocked” state even after you’ve updated permissions. Clearing site-specific data resets YouTube’s access and forces the browser to request permissions again.
In Chrome, visit chrome://settings/content/siteDetails?site=https%3A%2F%2Fwww.youtube.com or right-click the padlock in the address bar and select “Site settings.” Scroll to “Clear data” and click the button. This removes cookies, cached images, and permissions for YouTube only, leaving other sites untouched. Reload YouTube and allow microphone access when prompted.
For a full cache clear across all sites, open Chrome Settings > Privacy and security > Clear browsing data. Select “Cookies and other site data” and “Cached images and files” for the past 7 days. Avoid selecting passwords or autofill data unless necessary. Click “Clear data” and restart Chrome. When you revisit YouTube, the site treats you as a first-time visitor and requests all permissions fresh.
Firefox users should press Ctrl+Shift+Delete, choose “Cookies” and “Cache,” set the time range to “Everything,” and clear. Safari users open Preferences > Privacy > Manage Website Data, search for YouTube, and click “Remove.” Mobile users can clear cache in Settings > Chrome > Privacy > Clear browsing data (Android) or Settings > Safari > Clear History and Website Data (iOS). After clearing, grant microphone permissions again from scratch.
Update or Reinstall Drivers
Outdated or corrupted audio drivers prevent your operating system from communicating with the microphone hardware. Windows relies on Realtek, Intel, or manufacturer-specific drivers for built-in mics and USB devices. If these drivers fail, your mic won’t appear in device lists or will show zero input.
Open Device Manager (Win+X > Device Manager), expand “Audio inputs and outputs,” and locate your microphone. Right-click and select “Update driver” > “Search automatically for drivers.” Windows checks Microsoft’s driver database and installs any updates. If Windows reports “The best drivers are already installed,” visit your PC or motherboard manufacturer’s support site, Dell, HP, ASUS, and Lenovo often release updated Realtek drivers not available through Windows Update.
For USB microphones, check the manufacturer’s website. Blue, Rode, and Audio-Technica provide dedicated driver packages for Windows and Mac. Download and install the latest version, restart your computer, and reconnect the mic. If the mic still doesn’t appear, uninstall the device in Device Manager, unplug it, restart, and plug it back in. Windows will reinstall drivers from scratch.
Mac users should verify their macOS version is current, Apple includes audio driver updates in system updates. Open System Preferences > Software Update and install any available patches. For third-party USB mics, some require firmware updates via manufacturer-provided utilities. Rode’s Rode Central app and Blue’s Sherpa software manage firmware and settings for compatible mics. Firmware bugs can silently disable audio transmission even when the device appears active.
Disable Conflicting Browser Extensions
Browser extensions and add-ons can block or hijack microphone access. Privacy extensions, ad blockers, and script managers often include permission controls that override site-level settings. If you’ve enabled microphone access but YouTube still can’t capture audio, an extension may be interfering.
Open Chrome and type chrome://extensions/ in the address bar. Toggle off every extension except those absolutely required (password managers, for example). Refresh YouTube and test your microphone. If audio works, re-enable extensions one by one to identify the culprit. Common offenders include Privacy Badger, uBlock Origin (when misconfigured), and NoScript. These extensions block tracking scripts, but sometimes block legitimate media APIs too.
Create a new Chrome profile (chrome://settings/people > Add person) and log in to YouTube without any extensions installed. This isolates the issue. If the mic works in the clean profile, the problem is extension-related. You can either disable the conflicting extension permanently or configure its whitelist to allow YouTube. Most privacy extensions offer site-specific rules, add [*.]youtube.com to the allowed list.
Firefox users should launch Safe Mode (Help > Restart with Add-ons Disabled) to test without extensions. Safari users go to Preferences > Extensions and uncheck each one. On mobile, browser extensions are limited, but some Android browsers like Samsung Internet or Firefox support add-ons. Disable them in browser settings and retry.
Try a Different Browser
If none of the above fixes work, switching browsers isolates the issue. Download and install a fresh copy of Firefox or Microsoft Edge if you’ve been using Chrome. Open YouTube, allow microphone access when prompted, and test voice search or live streaming. If the mic works immediately, the original browser has a deeper configuration or profile corruption problem.
Chrome and Edge share the same Chromium base, so behavior is often identical, but Edge uses different default permission settings and extension ecosystems. Safari and Firefox use entirely different rendering engines (WebKit and Gecko), which handle media device APIs differently. A microphone that fails in Chrome may work flawlessly in Safari due to the way WebKit requests device permissions.
For mobile users, try the official YouTube app instead of the mobile browser. The app requests OS-level permissions directly, bypassing browser permission layers. On iOS, go to Settings > YouTube > Microphone and enable access. On Android, go to Settings > Apps > YouTube > Permissions > Microphone. If the app works but mobile Safari or Chrome doesn’t, your browser’s site permissions are the issue.
Consider using desktop recording software like OBS Studio as an alternative to YouTube Studio’s browser-based stream tool. OBS captures audio through your operating system’s input device, independent of browser permissions. You can stream to YouTube via RTMP using your stream key from YouTube Studio. This method bypasses browser restrictions entirely and gives you granular control over audio sources.
Frequently Asked Questions
Why is my YouTube microphone not working during live stream?
YouTube microphone failures occur at three levels: blocked browser permissions, system-level privacy settings, or incorrect device selection. Check Chrome/Safari permissions via the padlock icon, verify Windows/Mac privacy settings enable microphone access, and confirm the correct mic is selected in YouTube Studio settings.
How do I enable microphone permissions for YouTube in Chrome?
Navigate to chrome://settings/content/microphone and remove YouTube from the blocked list. Alternatively, click the padlock icon in the address bar while on YouTube, change Microphone from ‘Block’ to ‘Allow,’ and refresh the page. Chrome applies changes immediately without requiring a restart.
What should I do if YouTube microphone appears active but no sound is captured?
This indicates a device selection or hardware mute issue. Check YouTube Studio’s audio input dropdown and select each microphone while speaking, watching the level indicator bars. For physical USB mics, verify the mute button is off and gain dial is set appropriately.
Can browser extensions block my YouTube microphone access?
Yes, privacy extensions like Privacy Badger and uBlock Origin can interfere with microphone access. Test by disabling all extensions in chrome://extensions/ and retrying. If audio works, re-enable extensions one by one to identify the culprit, then whitelist YouTube in that extension’s settings.
How do I fix YouTube microphone not working on Mac?
Open System Preferences > Security & Privacy > Privacy and enable Microphone for Chrome, Safari, or Firefox. Then verify your input device in System Preferences > Sound > Input, select the correct microphone, and ensure the volume slider is near maximum. Close any other recording apps claiming exclusive mic access.
Why doesn’t my USB microphone show up in YouTube Studio?
Unplug the USB mic, wait five seconds, and reconnect—your system should emit a connection sound. If it still doesn’t appear, try a different USB port or test the mic on another computer. Outdated drivers may also prevent recognition; check the manufacturer’s website for driver updates and firmware patches.

Susan is a professional writer. She has been a writer for eight years and has always been so fulfilled with her work! She desires to share helpful, reliable, and unbiased information and tips about tech and gadgets. She hopes to offer informative content that can answer users’ questions and help them fix their problems.