
Are you interested in becoming a vlogger? Singer? A movie star? Or simply an enthusiast which often uses voice? If yes, we’re certain that using an external microphone like Boya Mic is a must for you. However, what if your Boya microphone doesn’t function well?
In this article, we lay out simple things you may check on your own to determine the problem and fix it.

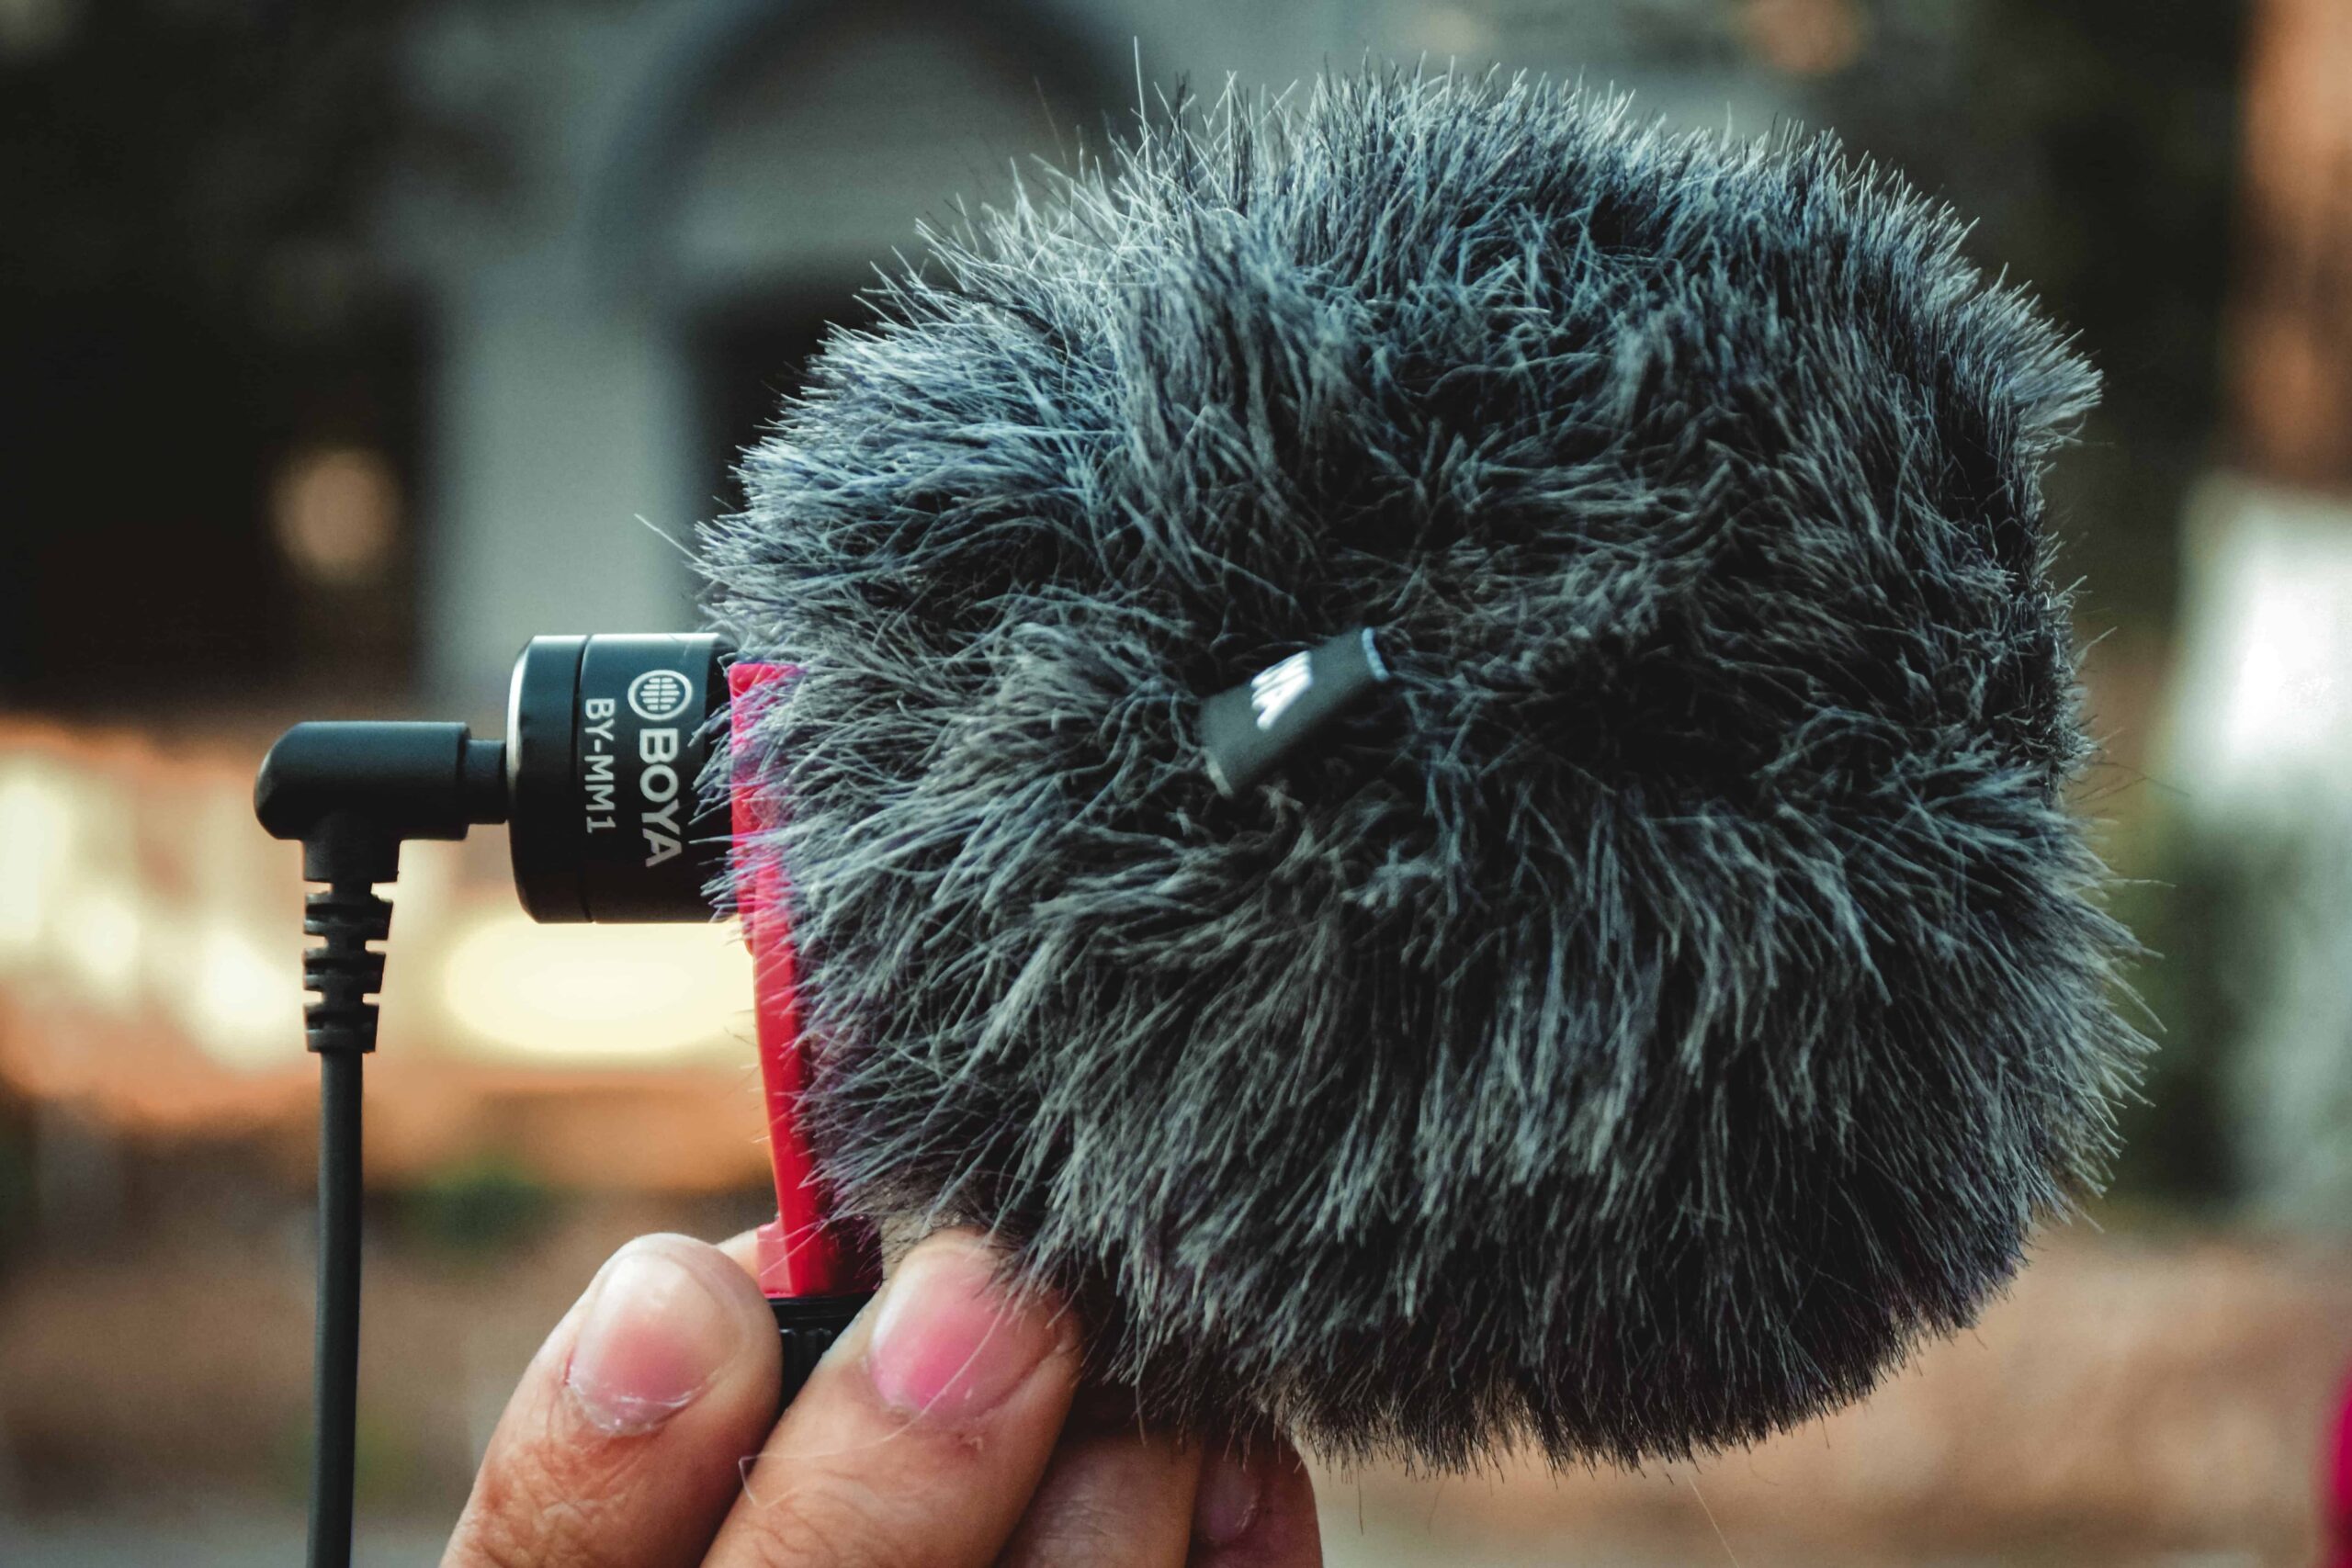
Troubleshooting Your Boya Mic
Ensure It Is Not Muted
After finding out Boya’s external microphone is not working, the foremost thing you need to do is make sure that it is not muted.
Almost all wireless devices, such as computers and laptops, feature a button that mutes the audio even when the machine is turned on, which is useful if you need to cough or anything. It’s not good if you accidentally hit it and then forget that it is turned off, muting the mic.
Check Your Batteries
Batteries are one of the most important parts of any electronic gadget. It is critical to ensure that your microphone is powered by fresh batteries rather than exhausted ones.
It is also important to Install batteries in the right polarities. If you are using a wireless microphone, batteries are necessary for your transmitter. Also, the receiver must be plugged into a power source. If you are using a wired microphone, make sure to check its batteries.
When checking Boya microphones, there is a little canister that has a switch to go from a camera to a smartphone. Rotate the microphone capsule counterclockwise until you see the inside layout, there is a battery in the compartment. The battery may be incorrectly oriented so make sure that the batteries are well installed.
The battery terminal may also have dirt, so it is important to clean it before installing the batteries. When using a smartphone, there is no need to install a battery. Make sure to have a bunch of the same batteries for easy swapping of exhausted batteries to fresh ones.
Inspect Cable And Adapter Connections
If the batteries are fresh powered and placed properly and you still have no sound from your Boya microphone, it is important to scan all the cable and adapter connections between the mic and the camera.
Connections vary based on the type of setup you are using; smartphone, computers, and other recording devices mode. Proceed to each spot where a jack or adapter connector plugs into a port and inspect if they are plugged in securely. It is a good idea to have a couple of cables on hand to make sure you can rule out this option when microphones are not working properly.
Plugging a jack and adapter in each port is too easy thinking that it is securely plugged in, but sometimes, it is loose causing the microphone not to function properly. So it is important to inspect each connection from the microphone jack to a smartphone, camera, laptop, computer, and other recording devices.
In jacks that are using an adapter, it is necessary to secure the adapter that you will use to make your mic work with your setup and make sure that all are plugged in each of their locations.
Distorted Audio
Quite often, alteration in signals causes the audio to be silent and the sound to be distorted, creating a fishbowl effect. You can identify this by checking your audio levels while recording, they will be much lower than usual and will not peak appropriately when tapping the microphone.
If you are unable to monitor the audio then you can check by playing back a clip and turning your volume upward and listening to see what was picked up.
Wrong Connector
As mentioned earlier, connections vary based on the type of setup you are using; smartphone, computers, and other recording devices mode. You must remember that while utilizing smartphones and laptops you must first turn on the power pack to the smartphone, then insert the 3.5mm connection into the laptop and phone’s audio port.
When you are using a camera and computer, it is important to turn the power pack’s switch to the camera setting, then insert the 3.5mm connection into the DSLR, camcorder, and desktop audio input port. Ensure that the switches are properly set first before connecting the microphone with your equipment.
Minimum 3.5 millimeters connectors have two different types with two different uses. While looking at the end of the connector, there are two or three black rings. The three rings in 3.5 mm connectors are only for plugging into a smartphone audio port, and the two rings in 3.5 mm connectors for traditional cameras.
Technically, if you are plugging the connector into a smartphone it needs the three-ring connector. If your 3.5mm connector has two rings and is intended to be plugged into the phone’s audio port, it will never work, and the microphone will not function well. In that case, the use of an adapter is needed to go from a two-ring to a three-ring connection.
For a three-ring to two-ring connection, look for a 3.5mm TRRS (Tip Ring Ring Sleeve) female to TRS (Tip Ring Sleeve) male adapter. Flip it around, if you need a two-ring to three-ring. provide a 3.5mm TRS female to TRRS male adapter.
Damaged Cord
If you have tried diagnosing the problem with the procedures mentioned above and your boya mic still doesn’t work, it is possible that it has a damaged cable. Anytime you use a cord, plugging in, disconnecting it, wrapping it up, transporting, tugging, pulling, and even being bent in ways they should not be.
As time passes by, the cord is starting to be damaged. little pieces of metal in there can bend too much or break and become disconnected which may remove the audio of the microphone.
To assess the functionality of the damaged cord, you have to find a working microphone and try it together with the damaged cord. If the microphone works and you can hear the audio, basically that means the cord is functioning well. On the other hand, if the microphone remains silent and nonfunctional, you need to buy a new cord and dispose of the damaged one.
Make Sure It Is Recording Correctly
You must ensure the functionality of the microphones and that you won’t end up with a silent or distorted recording.. You can do this by doing the following:
– Utilize the headphone audio jack on your device and try to monitor your audio.
– Check the levels on the screen of your device if available.
– Recording test clips and listening to the audio on playback.
– Ensuring that you are using functional cables.
This may be as simple as acquiring new colored cables for different uses or labeling them with devices for which they are intended. On the other hand, the easiest way to know it at first glance is by knowing the rings on the cables. If you want to save your time whenever you need them, you may do proper labeling and color-coding.
Not Working On PC
Online shopping is now the trend in the modern era, and a possibility of scam must always be prevented. Make sure that the one you purchased is original and not a fake one, through buying from the official shop with certification to ensure a fully functional microphone.
– Switch to camera mode
Camera used: TRS (2 lines)
Phone use: TRRS (3 lines)
– Battery Placement
Note the +/- polarity indicators, smooth top to spring, clean battery terminal, and make sure the cloth is not interfering with the battery surface
– Install Realtek Driver
It will try to extract all the data from the file. Just click “Next”, and will install the shield wizard. Press “Start”, type “Control Panel”, “Enter” and go to “Hardware and Sound” then “Sound”. Double click it. Go for “Recordings”.
Then you will see “Microphone” as soon as the cable is plugged in the pink color at the back of your computer or laptop. Make sure that the power pack’s switch button is switched on to camera mode, then test it out. Restart the computer and check if the Realtek Driver is installed or out.

Susan is a professional writer. She has been a writer for eight years and has always been so fulfilled with her work! She desires to share helpful, reliable, and unbiased information and tips about tech and gadgets. She hopes to offer informative content that can answer users’ questions and help them fix their problems.