
You type your email, password, address, and credit card details dozens of times every week. When Chrome’s autofill feature suddenly stops working, each checkout and login becomes a frustrating manual chore.
Chrome autofill stops working due to disabled settings, sync issues, corrupted cache, conflicting extensions, outdated browser versions, or incomplete saved data. You can restore autofill by verifying Chrome settings, clearing cache and cookies, disabling extensions, updating Chrome, checking saved entries, resetting sync, or creating a new profile.
Chrome’s autofill should save you time, but when it fails to populate passwords or payment methods, your productivity tanks. Let’s walk through every proven fix to restore seamless form completion and get you back to one-click checkouts.

Key Takeaways
- Chrome autofill not working is typically caused by disabled settings, sync issues, corrupted cache, conflicting extensions, or outdated browser versions—each fixable through systematic troubleshooting.
- Verify that autofill toggles for passwords, payment methods, and addresses are enabled in Chrome Settings, as accidental disabling during privacy cleanups is the most common culprit.
- Clear your browser cache and cookies using Ctrl+Shift+Delete (Windows) or Cmd+Shift+Delete (Mac) to eliminate corrupted files that prevent Chrome from recognizing form fields.
- Disable conflicting password manager extensions like LastPass, Dashlane, or 1Password, which hijack Chrome’s native autofill and prevent form completion.
- Update Chrome to the latest version to fix known form-parsing bugs, particularly for dynamic forms and JavaScript-heavy websites like React and Vue applications.
- Check your saved addresses and payment methods for incomplete or expired entries, and reset Chrome sync by signing out and back in if autofill data remains inaccessible.
Why Chrome Autofill Stops Working
Chrome’s autofill feature depends on several interconnected systems working in harmony. When one component breaks, the entire form-fill chain collapses.
The most common culprit is disabled autofill settings. Chrome won’t populate forms if you’ve accidentally toggled off “Offer to save passwords” or “Save and fill addresses.” Many users disable these during privacy audits and forget to re-enable them.
Sync conflicts create another major failure point. When your Google Account sync pauses due to authentication issues, Chrome can’t access your saved passwords and payment methods stored in Google Password Manager. Without active sync, your autofill data remains locked away from the browser.
Browser extensions that manage passwords, like LastPass, Dashlane, or 1Password, often hijack Chrome’s native autofill. These tools inject their own form-fill scripts, disabling Chrome’s built-in functionality. Corrupted cache files and outdated browser versions also trigger form-parsing bugs that prevent field recognition.
Check if Autofill Is Enabled in Chrome Settings
Start with the most straightforward fix: verify that Chrome’s autofill features are actually turned on.
Open Chrome and click the three-dot menu in the top-right corner. Select Settings, then navigate to Autofill and passwords in the left sidebar. You’ll see three separate sections: Google Password Manager, Payment methods, and Addresses and more.
Click into each section and confirm the toggle switches are enabled. For passwords, verify that “Offer to save passwords” is turned on. For payment methods, enable “Save and fill payment methods.” Under addresses, make sure “Save and fill addresses” is active.
“Chrome stopped filling my address at checkout until I realized the toggle was off after I cleared settings during a privacy cleanup.” via r/chrome
If any toggle appears grayed out, your organization’s IT policy might restrict autofill. Check with your system administrator if you’re using a work device.
Clear Your Browser Cache and Cookies
Corrupted cache and cookies frequently interfere with Chrome’s ability to recognize form fields and populate data correctly.
Press Ctrl+Shift+Delete (Windows) or Cmd+Shift+Delete (Mac) to open Chrome’s Clear browsing data panel. Select All time from the time range dropdown. Check the boxes for “Cookies and other site data” and “Cached images and files.” Leave “Browsing history” unchecked if you want to preserve your history.
Click Clear data and wait for Chrome to finish. Restart your browser completely, don’t just close the window. After restarting, visit a familiar login page and test if autofill prompts appear.
Clearing cookies logs you out of most websites, so keep your master passwords handy. This reset forces Chrome to rebuild its form-recognition database from scratch, eliminating corrupted entries that block autofill.
Disable Conflicting Browser Extensions
Third-party password managers and form-fill extensions clash with Chrome’s native autofill, creating competing scripts that cancel each other out.
Type chrome://extensions/ into your address bar and press Enter. Review every installed extension, paying special attention to password managers, VPNs, and privacy tools. Common conflicting extensions include:
- LastPass
- Dashlane
- 1Password
- Bitwarden
- Keeper
- RoboForm
Toggle off each password-related extension one at a time, then test autofill on a login form. If autofill suddenly works, you’ve identified the culprit. You can either uninstall that extension permanently or configure it to disable form-fill features in its settings.
For enhanced security while troubleshooting, consider using NordVPN to protect your login credentials during testing, especially on public networks. VPNs don’t interfere with autofill but add a crucial encryption layer when you’re typing passwords manually.
Update Chrome to the Latest Version
Outdated Chrome versions contain known form-parsing bugs that Google patches in newer releases. Running version 130.0 or earlier in 2026 almost guarantees autofill issues.
Click the three-dot menu, hover over Help, and select About Google Chrome. Chrome automatically checks for updates and downloads them. If an update is available, you’ll see a Relaunch button, click it immediately.
Google’s 2026 Chromium changelog specifically addressed autofill failures on dynamic forms, particularly on single-page applications that load form fields asynchronously. The April 2026 security update (version 131.0.6778.85) fixed a critical bug where autofill ignored fields rendered by JavaScript frameworks like React and Vue.
After updating, restart Chrome completely and test autofill on multiple sites. E-commerce platforms like Amazon and Shopify benefit most from these form-recognition improvements.
Verify Your Saved Autofill Data
Review Saved Addresses and Payment Methods
Chrome can’t autofill data that doesn’t exist or is stored incorrectly. Navigate to Settings > Autofill and passwords > Addresses and more. Click each saved address and verify every field contains accurate information. Missing ZIP codes or invalid state abbreviations prevent Chrome from matching form fields.
For payment methods, go to Settings > Autofill and passwords > Payment methods. Click each card to confirm the expiration date hasn’t passed and the billing address matches your current information. Expired cards won’t autofill, Chrome silently skips them to prevent transaction failures.
Visit passwords.google.com to review your saved passwords. Delete duplicate entries for the same website. Multiple credentials for one domain confuse Chrome’s autofill logic, causing it to freeze instead of prompting you to choose.
Fix Incomplete or Incorrect Entries
Incomplete address entries cause silent autofill failures. Chrome requires at minimum: full name, street address, city, state, and ZIP code. Missing even one field blocks the entire autofill action.
“My credit card wasn’t autofilling until I noticed the CVV field was somehow saved with letters instead of numbers.” via Google Chrome Community
Edit each saved entry and fill in blank fields. For international addresses, verify you’re using the correct country format. Chrome’s form parser expects U.S. addresses to follow USPS standards, using “St.” instead of “Street” won’t break autofill, but non-standard abbreviations might.
Test your fixes by visiting this Chromium test form to see if Chrome recognizes and populates fields correctly.
Reset Chrome Sync Settings
Paused or corrupted sync prevents Chrome from accessing your cloud-stored autofill data. Check your sync status by clicking your profile icon in the top-right corner.
If you see “Sync is paused,” click it and re-authenticate with your Google Account password. Your sync may have paused due to a password change on another device or security verification timeout.
To perform a full sync reset, go to Settings > You and Google > Sync and Google services. Click Manage what you sync, then toggle off Sync everything. Manually enable only Passwords, Payment methods, and Addresses. Click Sync now to force an immediate refresh.
For stubborn sync issues, sign out of Chrome completely. Go to Settings > You and Google and click Turn off next to your profile name. Restart Chrome, sign back in, and re-enable sync. This nuclear option rebuilds your local autofill database from your Google Account.
Disable and Re-enable Autofill Completely
Sometimes Chrome’s autofill gets stuck in a broken state. A quick disable-enable cycle resets the entire subsystem.
Go to Settings > Autofill and passwords. Turn off every autofill toggle: passwords, payment methods, and addresses. Close Chrome completely, don’t just close the window. Use Task Manager (Windows) or Activity Monitor (Mac) to verify no Chrome processes remain running.
Relaunch Chrome and return to Settings > Autofill and passwords. Re-enable all three toggles. This forces Chrome to reinitialize its form-recognition engine and rebuild the autofill cache.
Test immediately on a familiar site. If autofill still fails, the issue likely resides in corrupted user data or profile settings rather than the autofill system itself.
Check for Malware or Security Software Interference
Malware and overly aggressive security software inject code into Chrome that blocks autofill to steal credentials or prevent form submission.
Run a full system scan using Windows Defender or your preferred antivirus. Malware that injects form-grabbing scripts frequently disables legitimate autofill to force manual typing, making credential theft easier.
Some antivirus programs include “secure browser” features that override Chrome’s autofill. Check your security software settings for options labeled “Safe Banking,” “Browser Protection,” or “Form Protection.” Temporarily disable these features and test autofill.
For comprehensive protection and troubleshooting, use IObit Driver Booster to update all system drivers, including network and USB drivers that can interfere with browser input recognition. Outdated drivers occasionally cause input fields to become unresponsive to autofill scripts.
Create a New Chrome Profile
When all else fails, corrupted profile data is the culprit. Creating a fresh Chrome profile gives you a clean slate with functional autofill.
Click your profile icon in the top-right corner and select Add. Choose Continue without an account to create a local profile, or sign in with your Google Account to enable sync immediately. Chrome creates an entirely new user data folder with default settings.
Sign into your Google Account from the new profile to sync your passwords, addresses, and payment methods. Test autofill on multiple sites. If it works perfectly, your old profile contains corrupted data.
To fully migrate, visit Settings > Autofill and passwords in your old profile and manually export any data not synced to your Google Account. Chrome allows bookmark exports but requires manual re-entry for addresses and cards that weren’t synced.
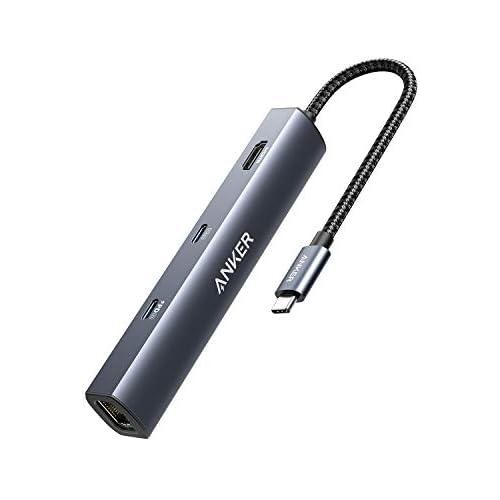
For desk organization during this migration, consider the Anker USB-C Hub to keep your workstation clean and connected while managing multiple browser profiles and testing configurations across devices.
Frequently Asked Questions
Why is Chrome autofill not working on my login forms?
Chrome autofill stops working due to disabled settings, sync issues, corrupted cache, conflicting extensions, or outdated browser versions. Start by checking if autofill is enabled in Chrome Settings > Autofill and passwords, then clear your cache and cookies.
How do I enable Chrome autofill if it’s turned off?
Open Chrome Settings, navigate to Autofill and passwords, and verify the toggles are enabled for passwords, payment methods, and addresses. If toggles appear grayed out, your organization’s IT policy may restrict autofill.
Can password manager extensions cause Chrome autofill to stop working?
Yes, extensions like LastPass, Dashlane, and 1Password hijack Chrome’s native autofill by injecting competing form-fill scripts. Disable conflicting password manager extensions at chrome://extensions/ to restore Chrome’s autofill functionality.
What should I do if clearing cache doesn’t fix Chrome autofill?
Update Chrome to the latest version, reset Chrome sync by signing out and back in, verify your saved addresses and payment methods are complete, and check that sync isn’t paused. If issues persist, create a new Chrome profile to eliminate corrupted data.
Why won’t my saved credit card autofill at checkout?
Chrome won’t autofill expired cards or incomplete payment method entries. Check Settings > Autofill and passwords > Payment methods to verify expiration dates are current and billing addresses are accurate.
Can antivirus software or malware block Chrome autofill?
Yes, malware can inject code to disable autofill, and some antivirus programs include ‘Safe Banking’ features that override Chrome’s autofill. Run a system scan and check your security software settings for browser protection features that may need adjustment.
Read More:
- Chrome Spell Check Not Working (Here’s the Easy Steps that Work)
- Chrome Not Working (These Simple Fixes Actually Work)
- Chrome Sound / Audio Not Working (Don’t Panic – These Fixes May Work)
- Chromebook Microphone Not Working (Key Reasons and How to Fix It)
- Chrome Microphone Not Working (Simple DIY Fixes That Works)

Susan is a professional writer. She has been a writer for eight years and has always been so fulfilled with her work! She desires to share helpful, reliable, and unbiased information and tips about tech and gadgets. She hopes to offer informative content that can answer users’ questions and help them fix their problems.