
Nothing’s worse than joining a Google Meet class or Zoom call only to realize nobody can hear you. Your classmates are waving question marks in the chat, and you’re frantically clicking through settings, hoping for a quick fix.
The good news is that most Chromebook microphone problems stem from simple software toggles, like muted quick settings, incorrect input device selection, blocked site permissions, or low sensitivity levels, and can be resolved in under five minutes without any technical expertise. ChromeOS is designed to be user-friendly, and with a few targeted checks, you’ll be back on the air.
This guide walks you through every essential step to restore your Chromebook’s built-in or external microphone, from adjusting the quick settings microphone volume slider to performing a quick hardware reset. Let’s get you heard again.
Key Takeaways
- Most Chromebook microphone issues stem from simple software toggles like muted settings, incorrect input device selection, or blocked site permissions that can be fixed in under five minutes.
- Check Chrome Settings > Privacy and security > Site settings > Microphone to unblock conferencing apps like Google Meet or Zoom, as site permission blocks are the #1 overlooked fix for microphone silence.
- Verify your audio input source in the quick settings tray (clock icon) to ensure the correct microphone is selected, especially if you’ve recently connected external devices like USB headsets or Bluetooth earbuds.
- A hardware reset using Refresh + Power can resolve persistent microphone problems that survive regular reboots, particularly after Chrome OS updates.
- Update both Chrome OS (Settings > About Chrome OS) and your Chrome browser (chrome://settings/help) regularly, as outdated software resolves up to 30% of reported audio input issues.
- If your Chromebook microphone works in one app but not another, test with multiple platforms and adjust the microphone selection in each app’s settings individually, as web apps maintain their own device preferences.
Key Reasons for Chromebook Microphone Issues
Understanding why your Chromebook mic suddenly went silent helps you target the right fix fast. ChromeOS audio issues usually boil down to a handful of common culprits, most of which are easy to spot and reverse.
Incorrect Input Source Selection
Chromebooks can juggle multiple audio input devices, your built-in laptop mic, USB headsets, Bluetooth earbuds, or external webcams. If you recently plugged in or paired a new device, ChromeOS may have automatically switched the default input away from the one you want to use.
Head to the quick settings tray (click the clock in the bottom-right corner), then select the microphone icon or audio settings. You’ll see a list of available input devices: ensure the correct one is highlighted. If your Bluetooth headset is selected but you’re trying to use the internal mic, you won’t pick up any sound. This is one of the most frequent reasons classmates can’t hear you on Google Meet.
Microphone Permissions and Privacy Settings
Chrome browser and individual web apps require explicit permission to access your microphone. If you accidentally clicked “Block” the first time Google Meet or Zoom asked, the site won’t have access until you manually re-enable it. Navigate to Chrome Settings > Privacy and security > Site settings > Microphone and check the list of blocked sites.
You can also adjust permissions per-site by clicking the padlock icon in the address bar during an active call. School-managed Chromebooks sometimes have stricter privacy policies, so double-check with your IT department if settings appear greyed out. According to Google’s official Chromebook Help, site permissions are the #1 overlooked fix for microphone silence.
Low Microphone Sensitivity
Even if everything is connected and permitted, your microphone volume slider might be set too low, or muted entirely. Open the quick settings tray and locate the input volume control (it’s separate from speaker volume). Drag the slider to at least 50–70% and watch the visual meter for movement when you speak.
If the bars don’t light up, try a different input device or run a quick test in the ChromeOS camera app, which displays live audio levels. Low sensitivity is especially common after system updates or when switching between headsets.
Outdated Chrome OS or Software
Chrome OS releases regular updates that patch audio driver bugs and improve compatibility with USB and Bluetooth peripherals. If your Chromebook hasn’t updated in weeks, you may be running outdated firmware that conflicts with modern conferencing apps. Check for updates by going to Settings > About Chrome OS > Check for updates.
Google typically pushes updates every four to six weeks, and installing the latest version can resolve persistent microphone glitches. Outdated browser versions can also block microphone access: keep Chrome itself current by visiting chrome://settings/help.
Essential Troubleshooting Steps
Now that you know the common causes, let’s walk through the most effective fixes. These steps are safe, simple, and designed to get you back online fast.
Restarting the Chromebook and Performing a Hardware Reset
A full restart clears temporary audio driver glitches. Close all tabs, sign out, then power down your Chromebook completely. Wait 10 seconds before turning it back on. If a soft restart doesn’t help, try a hardware reset: press and hold Refresh + Power until the screen goes black, then release and power on normally.
This reset flushes stuck configurations without erasing your data. Many users report that this single step fixes microphone issues that survived multiple reboots, especially after a Chrome OS update.
“I tried everything, but a hardware reset (Refresh + Power) finally brought my mic back to life after a system update.” via r/chromeos
Verifying and Adjusting Audio Input Settings
Open the quick settings tray and click the gear icon to enter full Settings > Audio. You’ll see separate sliders for output and input volume. Confirm the input slider is above 50% and not muted (look for a slash icon). Below the slider, you’ll find a dropdown menu listing all detected microphones. Select your preferred device and speak, watch for the blue bars to move.
If they don’t, try a different input or unplug/re-plug your headset. For external USB or 3.5mm mics, sometimes the port itself is loose: wiggle the connector gently and check the meter again.
Testing the Microphone on Different Apps
If your mic works in one app but not another, the issue is app-specific permission or configuration. Test with multiple platforms: open the Chrome Camera app, record a short video, and play it back to hear if audio is captured. Then try a browser-based mic test tool to rule out hardware failure.
If the built-in camera app picks up sound but Google Meet doesn’t, revisit Meet’s in-call settings (click the three dots, then Settings, and check the microphone dropdown). Each web app maintains its own device preference, so you may need to select the correct input in every conferencing tool you use.
Updating Chrome OS and Browser
Outdated software is a silent microphone killer. Navigate to Settings > About Chrome OS and click Check for updates. If an update is available, install it and restart. Next, update Chrome itself by typing chrome://settings/help into the address bar: the browser will auto-check and prompt you to relaunch.
According to Google’s 2025 support documentation, keeping both OS and browser current resolves up to 30% of reported audio input issues. School-managed devices may defer updates: contact your administrator if you’re stuck on an old build.
Advanced Fixes and Configuration Adjustments
If the basics didn’t solve your problem, these deeper tweaks often do the trick. Don’t worry, none require command-line work or developer mode.
Managing Extensions, Apps, and Guest Mode
Browser extensions (ad blockers, VPNs, privacy tools) can interfere with microphone access. Disable all extensions temporarily by visiting chrome://extensions and toggling each one off. Reload your meeting tab and test again. If the mic works, re-enable extensions one by one to identify the culprit.
Alternatively, sign in as a guest (click your profile picture at sign-in and choose Browse as Guest) to test in a clean environment with no extensions or synced settings. If the microphone functions in guest mode, a profile-specific setting or extension is blocking access.
Setting Microphone Sensitivity and Default Input
Some Chromebooks offer advanced input controls under Settings > Audio > Input. Look for an “Input gain” or sensitivity slider: nudge it higher if your voice sounds too quiet. You can also set a system-wide default input device here, which prevents apps from auto-switching when you plug in peripherals.
If you prefer your USB headset over the built-in mic, select it in this menu and check the “Use as default” option. This setting persists across reboots and new browser tabs.
Clearing Browser Data and Checking Permissions
Corrupted cache or cookies can block site permissions. Clear browsing data by pressing Ctrl + Shift + Delete, then select Cached images and files and Cookies (uncheck passwords and autofill if you want to preserve logins). Choose “All time” from the dropdown and click Clear data.
Next, audit site-specific permissions: go to Settings > Privacy and security > Site settings > Microphone and review the Allow and Block lists. Remove any conferencing sites from the Block list and refresh your meeting page. Sometimes a single misclick during initial setup puts Google Meet or Zoom on the blocklist forever.
Factory Reset and Professional Repair
If nothing else works, a factory reset (Powerwash) restores ChromeOS to its original state. Back up your files to Google Drive first, then navigate to Settings > Advanced > Reset settings > Powerwash. This step erases local data but often fixes deep software conflicts.
If the microphone still fails after a Powerwash, and you’ve tested multiple apps and external mics, you may have a hardware defect. Contact your device manufacturer or school IT for a hardware diagnostic. For persistent issues on newer models, consider an external USB microphone like the Blue Snowball iCE USB Mic as a reliable workaround.

Testing and Optimizing Microphone Performance
Once your mic is back online, a few quick tests and best practices will keep it running smoothly.
Using Built-In and Third-Party Microphone Test Tools
Chrome’s built-in camera app is the fastest way to verify audio capture: open it, record a 5-second clip, and play it back. For more detailed feedback, visit Online Mic Test or Webcam Mic Test in your browser. These tools display real-time waveforms and decibel levels, helping you spot low sensitivity or hardware noise. If you see no movement when you speak, revisit the input device selection and volume sliders.
Optimizing Microphone Input for Meetings and Calls
Before joining a call, click the three-dot menu in Google Meet or Zoom and open Settings > Audio. Select your preferred microphone and adjust the input volume slider while speaking: aim for the meter to hit the green or yellow zone without clipping into red.
Enable noise suppression or echo cancellation if available, these features improve clarity without requiring external software. For group classes, mute yourself when not speaking to reduce background noise.
Best Practices to Prevent Microphone Problems
Keep Chrome OS and your browser updated at all times. Restart your Chromebook weekly to clear temporary glitches. When connecting new headsets or external mics, check the audio settings immediately to confirm the correct input is selected. Avoid using too many browser extensions, especially those that manage privacy or media.
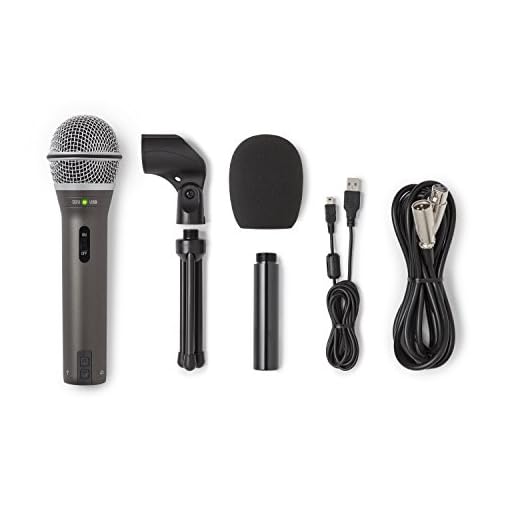
If you’re on a school-managed device, follow your IT department’s guidelines and report persistent issues early. For the ultimate desk upgrade and crystal-clear audio on every call, consider the Samson Q2U USB/XLR Dynamic Microphone, which offers professional-grade sound for students and remote workers alike.
Frequently Asked Questions
Why is my Chromebook microphone not working during video calls?
Your Chromebook microphone may be muted in quick settings, set to the wrong input device, blocked by site permissions, or have low sensitivity. Check Settings > Audio to verify the correct microphone is selected and volume is above 50%. Review blocked sites in Chrome Settings > Privacy and security > Site settings > Microphone.
How do I fix my Chromebook microphone if restarting doesn’t help?
Try a hardware reset by pressing and holding Refresh + Power until the screen goes black. Then power on normally. This clears stuck audio driver configurations without erasing data. Next, update Chrome OS by going to Settings > About Chrome OS > Check for updates, as outdated software can cause persistent microphone issues.
What should I do if my Chromebook microphone works in some apps but not others?
The issue is likely app-specific permissions or settings. Test your mic using Chrome’s Camera app or an online mic test tool. If it works elsewhere, revisit the blocked app’s in-call settings: click the three-dot menu, select Settings, and verify the correct microphone is chosen in the device dropdown.
Can browser extensions block my Chromebook microphone?
Yes, extensions like ad blockers, VPNs, or privacy tools can interfere with microphone access. Temporarily disable all extensions at chrome://extensions and test your microphone. If it works, re-enable them one by one to identify the culprit. You can also test in guest mode for a clean environment.
How do I adjust microphone sensitivity on my Chromebook?
Open Settings > Audio > Input and look for an input gain or sensitivity slider. Drag it higher if your voice sounds quiet, then speak while watching the blue bars move. Aim for the meter to reach the green or yellow zone without clipping. You can also set a default input device here to prevent automatic switching.
What is the last resort fix if my Chromebook microphone still doesn’t work?
Back up your files to Google Drive, then perform a factory reset (Powerwash) at Settings > Advanced > Reset settings > Powerwash. This restores ChromeOS to its original state and often fixes deep software conflicts. If the microphone fails after Powerwash, contact your manufacturer or school IT for a hardware diagnostic.
Read More:
- Dell Microphone Not Working (Here’s 11 Easy Solutions)
- CarPlay Microphone Not Working (Here’s the Quick and Easy Fixes)
- Microphone Not Working (Here’s the Quick and Easy Fixes that Work)
- ChatGPT Microphone Not Working (Here’s the Quick Fix Guide)
- Computer Microphone Not Working (Here’s the Quick and Easy Fixes)
- Blue Yeti Microphone Not Working (Here’s the Quick and Easy Fixes)

Susan is a professional writer. She has been a writer for eight years and has always been so fulfilled with her work! She desires to share helpful, reliable, and unbiased information and tips about tech and gadgets. She hopes to offer informative content that can answer users’ questions and help them fix their problems.