
Your microphone cuts out right before an important Zoom meeting. The panic sets in fast. You can see everyone on screen, but nobody can hear you. Your camera works fine, but your voice disappears into the digital void.
When your computer microphone isn’t working, the fix usually involves checking four key areas: ensuring the correct microphone is selected as your default input device in system sound settings, granting microphone permissions to the apps you’re using, verifying no physical mute buttons are engaged on your headset or cable, and testing the microphone volume levels in your operating system’s audio control panel. Most microphone failures stem from simple software toggles or privacy settings, not broken hardware, and you can typically restore your audio input in under five minutes.
This guide walks you through practical, jargon-free steps to diagnose and fix the most common microphone problems on Windows and macOS. You’ll learn how to change default audio input device settings, unmute application-specific microphone levels easily, adjust microphone privacy permissions, and test your setup without needing any technical background.
Key Takeaways
- When a computer microphone is not working, start by checking physical connections, verifying the default input device in system sound settings, granting app permissions, and testing microphone volume levels—most issues resolve in under five minutes.
- Physical mute buttons on headset cables and keyboard shortcuts are frequently overlooked culprits; always inspect hardware controls before diving into software troubleshooting.
- On Windows, go to Settings > Sound > Input to select your default recording device, while macOS users should navigate to System Settings > Sound > Input to manage microphone defaults.
- Both Windows and macOS require explicit permission grants in privacy settings before apps like Zoom, Teams, and Discord can access your microphone; check these toggles before assuming hardware failure.
- Disabling Windows audio enhancements like noise suppression and echo cancellation can restore microphone functionality if these features are causing cuts or robotic sound quality.
- For persistent microphone problems, use Windows Device Manager to update or reinstall audio drivers, or run the built-in Recording Audio Troubleshooter to automatically detect and fix common issues.
Diagnosing Microphone Detection Issues
Checking Physical Connections and Hardware
Start with the basics. If you’re using an external microphone or headset, unplug it and plug it back in firmly. Sometimes the 3.5mm jack doesn’t seat properly, or a USB connector isn’t making full contact. Look for a small LED indicator on the microphone or headset, if it’s supposed to light up and doesn’t, you might have a power or connection issue.
Check for a physical mute button on your headset cable or earpiece. Many modern headsets include a tiny switch or touch sensor that silences the mic independently of software settings. I’ve lost count of how many “broken” microphones were simply muted at the hardware level. Run your fingers along the cable and feel for any inline controls.
If you’re relying on your laptop’s built-in microphone, make sure nothing is blocking the tiny holes near your keyboard or screen bezel. Dust, stickers, or even a case cover can muffle or completely block the internal mic. A quick visual inspection saves a lot of troubleshooting time.
Identifying Microphone in Sound Settings
Open your system sound settings to confirm your computer even recognizes the microphone. On Windows 11, right-click the speaker icon in your taskbar and select “Sound settings.” Scroll down to “Input” and check which device is listed. You should see your microphone’s name, like “Internal Microphone,” “USB Audio Device,” or your headset’s brand name.
On macOS, open System Settings, click “Sound,” then navigate to the “Input” tab. Your active microphone appears at the top of the device list. Speak into the mic and watch the input level bars. If they don’t move at all, your Mac isn’t hearing you, and you’ll need to dig deeper.
If your microphone doesn’t appear in the list at all, your computer isn’t detecting it. That points to a connection problem, a driver issue, or, less commonly, actual hardware failure. Before you panic, try a different USB port or restart your computer. A simple reboot clears temporary audio glitches more often than you’d think.
Recognizing USB and Bluetooth Microphone Problems
USB microphones can be finicky. Windows sometimes assigns them a generic “USB Audio Device” label, making it hard to tell which microphone you’re actually using. If you have multiple USB audio devices plugged in (like a webcam with a built-in mic, a gaming headset, and a standalone mic), Windows might default to the wrong one.
Bluetooth headsets introduce another layer of complexity. Bluetooth audio devices often register twice: once as a “Headset” profile (optimized for calls, with a microphone) and once as a “Headphones” profile (higher-quality stereo, but no mic input). If your computer switches to the Headphones profile, your microphone vanishes. You’ll need to manually select the Headset profile in your sound settings.
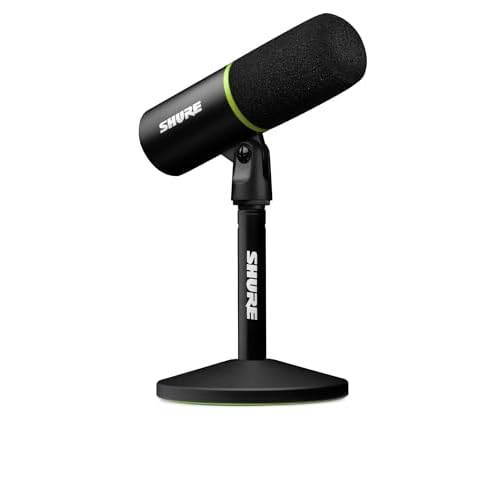
For a reliable external USB microphone, consider upgrading to a plug-and-play model that Windows and macOS recognize instantly. It eliminates a lot of guesswork and connection hassles, especially if you’re frequently joining video calls.
Configuring Permissions and Settings
Selecting the Default Recording Device
Your computer might detect your microphone but still send audio from the wrong input. In Windows, navigate to Settings > System > Sound, then click “More sound settings” under Advanced. The old-school Sound control panel opens. Switch to the “Recording” tab and you’ll see every microphone Windows knows about.
Right-click your preferred microphone and choose “Set as Default Device.” A green checkmark with a circle appears next to it. That tells every app, Zoom, Discord, Chrome, whatever, to use this microphone unless the app overrides it. If you see a microphone grayed out or showing “Not plugged in,” it’s either disconnected or disabled.
On macOS, the process is simpler. Open System Settings > Sound > Input, then click the microphone you want to use. macOS makes it your system-wide default immediately. If an app like Zoom or Teams still can’t hear you, the problem is usually app-level permissions, not the default device setting.
Allowing Apps to Access Your Microphone
Both Windows and macOS include privacy gates that block apps from accessing your microphone until you explicitly grant permission. On Windows 11, go to Settings > Privacy & security > Microphone. Toggle “Microphone access” to On, and make sure “Let apps access your microphone” is also enabled. Scroll down and you’ll see a list of installed apps, flip the switch for Zoom, Teams, Discord, or whatever you’re using.
Mac users should open System Settings > Privacy & Security > Microphone. You’ll see a list of apps that have requested mic access. Check the box next to each app you want to allow. If an app isn’t listed, it hasn’t asked for permission yet. Launch the app and try to use your microphone, macOS will prompt you the first time.
According to a Microsoft support document on microphone privacy, many users overlook these privacy toggles and assume their microphone is broken. It’s a simple fix, but it’s not always obvious where to look.
Managing Microphone Access for Desktop and Browser Apps
Browser-based apps like Google Meet, Microsoft Teams (web version), and Discord in Chrome need separate permissions. When you join a meeting for the first time, your browser shows a pop-up asking, “Allow this site to use your microphone?” If you accidentally clicked “Block,” the site can’t hear you until you reverse that decision.
In Chrome, click the padlock icon in the address bar, then look for “Microphone” in the permissions dropdown. Switch it from “Block” to “Allow” and refresh the page. Firefox and Edge have similar controls, just click the site information icon and adjust microphone permissions.
For desktop apps, check the in-app settings. Zoom, Teams, and Discord all let you choose your microphone inside the app itself, overriding your system default. Open the app’s audio settings and make sure it’s pointing to the right device. That’s often where the mismatch happens.
Troubleshooting Audio Performance
Running the Recording Audio Troubleshooter
Windows includes a built-in troubleshooter that can automatically detect and fix common microphone issues. Go to Settings > System > Troubleshoot > Other troubleshooters, then click “Run” next to “Recording Audio.” Windows scans your audio configuration, checks for disabled devices, and attempts to reset settings that might be causing problems.
The troubleshooter isn’t magic, but it’s surprisingly effective. It can re-enable a microphone you accidentally disabled, reset audio services that crashed in the background, or detect if your microphone is set to an extremely low volume. It takes about 60 seconds and requires zero technical knowledge.
Mac doesn’t have an equivalent automated troubleshooter, so you’ll need to manually check each setting. But the process is straightforward: verify your input device, check permissions, and test the mic in System Settings > Sound > Input by speaking and watching the level meter.
Testing and Adjusting Microphone Volume
Even if your microphone is connected and recognized, it might be set so quiet that nobody can hear you. In Windows, open Settings > System > Sound, click your microphone under Input, then adjust the “Input volume” slider. Speak at a normal volume and watch the blue bar, it should bounce up to at least 50-70%.
If the bar barely moves, your microphone level is too low. Click “Device properties” for more granular control, or open the classic Sound control panel (right-click the speaker icon > Sounds > Recording tab), double-click your microphone, and go to the “Levels” tab. The slider here controls how much your computer amplifies the mic signal. Set it to 80-100 for most USB and built-in mics.
On macOS, the Input volume slider in System Settings > Sound > Input does the same job. Drag it to the right and test by speaking. If the input level bars stay flat, your Mac isn’t picking up any sound, double-check your device selection and permissions.
Addressing Microphone Mute Button and Muting Issues
Application-specific muting is a major culprit. You might have your system microphone enabled, but Zoom or Teams has a mute toggle turned on. Every video conferencing app shows a microphone icon, usually at the bottom of the window. If it has a red slash through it, click to unmute.
Keyboard shortcuts add another layer. Many laptops have a dedicated mute key (often F4 or F10 with a microphone icon). Press it once and your mic mutes system-wide. Press it again to unmute. Check your keyboard’s function row, if the mic icon is lit or a different color, you’ve muted yourself at the hardware level.
“I spent 20 minutes troubleshooting my mic in Windows settings, only to realize I’d hit the mute button on my headset cable. The little switch was barely visible, but it was the whole problem.” via r/techsupport
That scenario is incredibly common. Always check physical controls before diving into software diagnostics.
Disabling Audio Enhancements
Windows applies audio enhancements like noise suppression, echo cancellation, and bass boost to improve sound quality. Sometimes these features backfire, causing your microphone to cut out, sound robotic, or stop working altogether. Disabling them often restores normal function.
Open the Sound control panel (right-click speaker icon > Sounds), go to the Recording tab, double-click your microphone, and switch to the “Enhancements” tab. Check the box that says “Disable all enhancements,” click Apply, then OK. Test your microphone in a call or recording app.
If the Enhancements tab is missing, your audio driver doesn’t support those features, which means they’re not causing your problem. macOS generally doesn’t apply system-level enhancements, so Mac users can skip this step.
Advanced Fixes and Prevention
Updating or Reinstalling the Audio Driver
Outdated or corrupted audio drivers can prevent your microphone from working. Press Win + X and select “Device Manager” from the menu. Expand “Audio inputs and outputs,” right-click your microphone, and choose “Update driver.” Windows searches for the latest driver online and installs it if available.
If updating doesn’t help, try reinstalling. Right-click the microphone in Device Manager and select “Uninstall device.” Restart your computer, and Windows automatically reinstalls the driver from scratch. This process clears out any corrupted settings or software conflicts.
For a dedicated recording setup, consider a professional USB audio interface that includes dedicated drivers and eliminates most driver-related headaches. It’s the ultimate hardware workaround if you’re constantly battling microphone issues.

Mac users can check for driver updates via System Settings > General > Software Update. macOS handles audio drivers automatically, so manual driver management is rarely necessary. If your Mac’s built-in mic stops working after an update, an Apple support article on sound issues recommends resetting the NVRAM by restarting and holding Option + Command + P + R until you hear the startup chime twice.
Using Scan for Hardware Changes in Device Manager
Sometimes Windows loses track of a connected microphone, especially after a sleep/wake cycle or USB device shuffle. Open Device Manager, click the “Action” menu at the top, and select “Scan for hardware changes.” Windows re-scans all connected devices and may rediscover your microphone.
This trick works particularly well for USB and Bluetooth microphones that disconnect intermittently. It forces Windows to refresh its device list without a full reboot. You’ll see the device list flicker as Windows rescans, if your microphone reappears, you’re good to go.
If you want a deeper jump into Windows microphone troubleshooting, Microsoft’s official guide covers additional steps like checking sample rate settings and disabling exclusive mode.
Best Practices for Avoiding Future Issues
Keep your operating system and apps updated. Updates often include audio driver patches and compatibility fixes that prevent microphone problems before they start. Enable automatic updates if you haven’t already, it’s the easiest way to stay current.
Restart your computer regularly. I know it sounds boring, but a weekly reboot clears out temporary audio service glitches that accumulate over time. Modern computers boot fast, and it’s a simple habit that prevents a lot of headaches.
If you rely on an external microphone or headset, invest in quality gear and keep cables organized. Cheap cables fray, connectors loosen, and intermittent connections drive you crazy. A reliable microphone is worth the investment if you spend hours each week on calls.
For visual troubleshooting, this YouTube guide walks through common Windows microphone fixes step-by-step:
Finally, create a simple checklist for yourself: check physical connections, verify the default device, confirm app permissions, and test the volume. Run through those four steps whenever your microphone acts up, and you’ll solve 90% of issues in under five minutes.
Frequently Asked Questions
Why is my computer microphone not working on Windows 11?
Check four key areas: ensure the correct microphone is selected as your default input device in Sound settings, grant microphone permissions to your apps, verify no physical mute buttons are engaged, and test microphone volume levels. Most issues stem from software toggles or privacy settings, not hardware failure, and can be fixed in under five minutes.
How do I set a default recording device for my microphone?
On Windows, navigate to Settings > System > Sound > More sound settings, click the Recording tab, right-click your preferred microphone, and select “Set as Default Device.” On macOS, open System Settings > Sound > Input and click your microphone. This applies system-wide unless an app overrides it.
What should I do if my microphone doesn’t appear in sound settings?
Your computer isn’t detecting the microphone. Try unplugging and firmly re-plugging it into a different USB port, or restart your computer to clear temporary audio glitches. Check for physical connection issues or damaged cables. If it still doesn’t appear, you may have a driver problem or hardware failure.
How can I allow apps like Zoom to access my microphone?
On Windows 11, go to Settings > Privacy & security > Microphone and enable “Microphone access.” Scroll down to toggle the switch for each app like Zoom or Teams. On macOS, open System Settings > Privacy & Security > Microphone and check the box for each app that needs access.
What’s the difference between a Bluetooth Headset profile and Headphones profile?
The Headset profile optimizes for calls with microphone input, while the Headphones profile provides higher-quality stereo but no mic. If your computer switches to Headphones, your microphone disappears. Manually select the Headset profile in your sound settings to restore microphone functionality.
Can I fix a computer microphone not working by updating audio drivers?
Yes. Open Device Manager (Win + X), expand “Audio inputs and outputs,” right-click your microphone, and select “Update driver.” If updating fails, uninstall the device, restart your computer, and Windows will automatically reinstall it, clearing corrupted settings and software conflicts.
Read More:
- Microphone Not Working (Here’s the Quick and Easy Fixes that Work)
- Beats Studio Buds Microphone Not Working (Here’s the Quick Fixes)
- Acer Microphone Not Working (Here’s the Quick and Easy Fixes)
- Microphone Not Working on Laptop (Here’s the Reasons and How to Fix It)
- Microphone Not Working on Android (Here’s the Easy Fixes That Work)
- Dell Microphone Not Working (Here’s 11 Easy Solutions)

Susan is a professional writer. She has been a writer for eight years and has always been so fulfilled with her work! She desires to share helpful, reliable, and unbiased information and tips about tech and gadgets. She hopes to offer informative content that can answer users’ questions and help them fix their problems.