
You plug in your EarPods, dial in for a call, and nobody can hear you. Whether you’re on FaceTime, a work Zoom, or recording a voice memo, the silence on the other end is frustrating.
When your EarPods microphone stops picking up sound, the culprit is usually pocket lint or debris clogging the Lightning or 3.5mm jack, a loose connection, incorrect system audio settings, or app-level microphone permissions that need manual approval in iOS or macOS Settings.
This guide walks you through simple, non-technical fixes, cleaning steps, software toggles, and quick tests, to restore crystal-clear voice input in minutes. No tools, no jargon, just practical steps that work.

Key Takeaways
- EarPods microphone not working is typically caused by debris clogging the connector, incorrect app permissions, or lingering Bluetooth device settings that override your wired connection.
- Clean the Lightning or 3.5mm jack with a dry toothpick and isopropyl alcohol, then inspect the inline microphone grille on the cable with a cotton swab to eliminate the most common blockage issues.
- Check iOS Privacy & Security > Microphone settings and grant app-level permissions to FaceTime, Zoom, and Voice Memos, which are often disabled by default and prevent audio input.
- Test your EarPods on another iPhone, iPad, or Mac to quickly determine whether the problem is a device settings glitch or actual hardware damage to the inline microphone.
- Update iOS, iPadOS, or macOS to the latest version, as Apple regularly ships audio-stack bug fixes that resolve wired accessory compatibility issues.
- If cleaning, testing permissions, and software updates don’t restore your EarPods microphone, contact Apple Support or visit a Genius Bar for warranty replacement, since wired EarPods cannot be professionally repaired.
Common Causes of Microphone Issues
Debris and Earwax Blockage
Pocket lint, dust, and earwax are the top offenders. When you shove EarPods into a bag or pocket, tiny fibers sneak into the Lightning, USB-C, or 3.5mm plug. That debris compresses over time, blocking the electrical contacts your device needs to detect the inline mic. Even a barely visible speck can stop audio transmission cold.
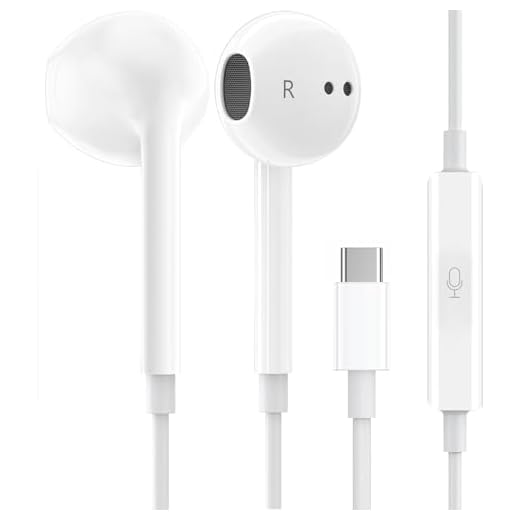
The inline microphone grille, those tiny holes on the cable, also traps earwax and skin oils. If you wear EarPods during workouts or long calls, sweat and body debris accumulate fast. A clogged grille muffles your voice or silences it entirely. Regular inspection and gentle cleaning prevent most blockage-related failures.
Bluetooth and Connectivity Problems
Wait, EarPods are wired, right? Yes, but if you’ve also paired AirPods or a Bluetooth headset recently, your iPhone or Mac may still default to that wireless device. iOS and macOS remember the last active audio route, so even when you plug in wired EarPods, the system might route microphone input to a disconnected Bluetooth accessory.
Check your device’s Bluetooth menu. Turn off or “Forget” any lingering wireless headphones. Then unplug and re-plug your EarPods. The system should auto-switch to the wired mic, but manual selection in Control Center or Sound settings ensures it sticks.
Battery and Charging Concerns
Unlike AirPods, wired EarPods draw power directly from your device, no battery, no charging worries. But if your iPhone or iPad battery is critically low (below 10%), iOS may throttle accessory power or disable certain ports to preserve charge. That can interrupt microphone detection.
Also, third-party or damaged Lightning cables sometimes fail to deliver consistent power. If you’re using a non-Apple adapter or a frayed cable, the inline mic may flicker on and off. Swap in a known-good Apple cable and charge your device above 20% to rule out power issues.
Essential Troubleshooting Steps
Cleaning the Microphone Safely
Grab a flashlight and inspect the plug. See fuzz? Use a wooden toothpick or a dry, soft-bristled toothbrush to gently scrape lint out of the Lightning or headphone jack on your device. Don’t use metal, scratching the contacts kills connectivity. For stubborn gunk, wrap the toothpick tip in a tiny piece of microfiber cloth dampened (not wet) with isopropyl alcohol.
Next, examine the inline mic grille on the EarPods cable. Wipe it with a dry cotton swab. If it’s visibly clogged, dip the swab in isopropyl alcohol, squeeze out excess liquid, and gently roll it over the grille. Let everything air-dry for two minutes before plugging back in. Apple’s official cleaning guide recommends avoiding moisture inside ports, so keep fluids minimal.
Checking Device Input Settings
Plug in your EarPods, then open Settings > Privacy & Security > Microphone on iPhone or iPad. Scroll through the app list, FaceTime, Zoom, Voice Memos, and toggle on any app showing “off.” iOS blocks mic access by default for new apps, and a single denied permission can silence your EarPods entirely.
On Mac, go to System Settings > Sound > Input and confirm “External Microphone” or “EarPods” appears as the selected device. If it shows “Internal Microphone” instead, click the EarPods entry. Also check System Settings > Privacy & Security > Microphone and enable any communication app you use. Testing wired earbud microphone functionality in the settings panel takes 30 seconds and fixes most permission-related glitches.
Testing With Different Devices
Connect your EarPods to another iPhone, iPad, or Mac. Open Voice Memos or FaceTime Audio and record a test clip. Play it back. If the mic works perfectly on device B, the problem lies in device A’s settings or port. If it’s still silent, your EarPods cable or inline mic is likely damaged.
You can also test on a Windows PC (3.5mm or USB-C models) or Android phone. Cross-device testing isolates hardware failures fast. If nobody hears you across multiple devices, it’s time to consider a replacement or Apple’s EarPods with Lightning Connector as a backup.
Restarting and Reconnecting
Sometimes iOS or macOS audio drivers glitch mid-session. Unplug your EarPods, restart your device (hold Side + Volume Down, slide to power off, wait 10 seconds, power on), then plug the EarPods back in. A fresh boot clears cached audio routes and re-enumerates USB or Lightning accessories.
After restart, test the inline volume and play/pause buttons. Press them a few times, the tactile click confirms the cable’s electrical integrity. If buttons respond but the mic stays silent, the inline microphone chip may have failed. If nothing responds, the cable itself is broken.
Software Solutions for Persistent Problems
Update iOS and Firmware
Apple ships audio-stack bug fixes in point releases. Go to Settings > General > Software Update and install any pending iOS, iPadOS, or macOS update. According to Apple’s support documentation, wired accessory compatibility improvements often arrive in minor patches.
EarPods don’t have user-updatable firmware, they’re purely analog or digital-audio-over-Lightning, but your iPhone’s audio codec and driver can improve. After updating, reboot once more and re-test. Many “EarPods connected but silent” errors vanish post-update.
Reviewing App Permissions
Zoom, Teams, Discord, and other VoIP apps each maintain separate microphone toggles. Open the app, go to Settings > Audio, and confirm “EarPods” or “External Microphone” is selected. Some apps default to “iPhone Microphone” even when EarPods are plugged in.
In iOS, swipe into Settings > [App Name] and verify Microphone access is green. If you recently reinstalled the app or restored from backup, permissions reset. Granting app-level microphone privacy permissions on Apple devices is a one-tap fix that immediately restores voice input.
“I couldn’t figure out why Zoom wasn’t picking up my EarPods mic. Turned out the app had microphone access turned off in Settings. One toggle and I was back in business.” via r/applehelp
Resetting and Pairing Earpods
Wired EarPods don’t “pair” like Bluetooth devices, but you can reset audio settings. On iPhone, go to Settings > General > Transfer or Reset iPhone > Reset > Reset All Settings. This wipes Wi-Fi passwords and wallpapers but leaves your data intact. It also clears any corrupted audio-route preferences.
On Mac, reset the NVRAM: shut down, then power on while holding Option + Command + P + R for 20 seconds. Release when you hear the startup chime twice (or see the Apple logo flash twice on M1/M2 Macs). NVRAM stores audio-device memory: a reset forces macOS to rediscover your EarPods from scratch.
Adjusting Microphone Settings
In macOS, open System Settings > Sound > Input, select your EarPods, then drag the “Input volume” slider to maximum. Speak into the inline mic and watch the input-level meter. If bars light up, your mic works, apps may just need higher gain. If bars stay flat, the hardware is faulty.
iOS doesn’t expose a global input-level slider, but you can test in Voice Memos. Record 10 seconds of speech, play back, and listen. If it’s too quiet, the inline mic membrane may be damaged or the cable’s internal wiring is frayed. Testing apple earpods inline microphone input levels in settings takes under a minute and confirms whether software or hardware is the blocker.
When to Seek Professional Support
Identifying Hardware Failures
If you’ve cleaned, updated, checked permissions, and tested on multiple devices, and the mic remains silent, your EarPods likely have internal cable damage. The inline microphone connects via fragile wires: pulling the cable at sharp angles or snagging it on a door handle can sever those strands.
Look for kinks, fraying near the plug, or a cable that feels unusually stiff in one spot. Flex the cable gently near the inline mic while recording in Voice Memos. If sound cuts in and out, the break is physical. Unfortunately, wired EarPods aren’t user-repairable, once the cable fails, replacement is your only fix.
Contacting Apple Support
If your EarPods are under warranty or you purchased AppleCare+, visit Apple Support or call 1-800-MY-APPLE. Apple will run remote diagnostics on your iPhone or Mac to verify the port and audio subsystem are healthy. If the port is fine, they’ll often ship replacement EarPods at no charge (warranty permitting).
You can also book a Genius Bar appointment. Bring your EarPods and device: the technician will test with known-good hardware to isolate the fault. Apple’s in-store diagnostic tools measure electrical continuity in the inline mic circuit, something you can’t do at home.
“Took my EarPods to the Apple Store. They tested them on a demo iPhone, confirmed the mic was dead, and swapped them for free because I was within the one-year warranty window.” via Apple Support Communities
Options for Repair or Replacement
Apple doesn’t repair EarPods, the labor cost exceeds the product value. If out of warranty, a new pair of Apple EarPods with USB-C runs around $19–$29. For a future-proof desk setup, consider a dedicated USB microphone as your ultimate hardware workaround, it bypasses cable fragility and delivers studio-grade voice clarity for calls and recordings.
Third-party repair shops won’t touch EarPods either: the inline components are too small to rework. Your best move: keep a spare pair in your desk drawer. Wired headphones remain the most reliable plug-and-play option, and having a backup ensures you’re never caught silent mid-meeting.
Frequently Asked Questions
Why is my EarPods microphone not working?
Common causes include pocket lint or debris clogging the Lightning jack, loose Bluetooth connections to other devices, incorrect app permissions in iOS Settings, or damaged cables. Start by cleaning the plug, checking Microphone privacy settings, and testing on another device to isolate the issue.
How do I clean my EarPods microphone safely?
Use a dry cotton swab to gently wipe the inline mic grille. For stubborn debris, lightly dampen the swab with isopropyl alcohol, squeeze out excess liquid, and gently roll it over the grille. Also inspect the Lightning/headphone jack on your device and use a wooden toothpick to carefully remove lint. Air-dry for two minutes before reconnecting.
How do I fix microphone permissions for my EarPods on iPhone?
Go to Settings > Privacy & Security > Microphone and ensure the app you’re using (FaceTime, Zoom, Voice Memos) is toggled ON. iOS blocks mic access by default for new apps. Also check individual app settings within the app itself to confirm EarPods or External Microphone is selected as the input device.
What should I do if my EarPods mic works on one device but not another?
This indicates a software or settings issue on the problematic device, not a hardware failure. Check that device’s Microphone privacy permissions, Input settings, and Bluetooth connections. Update iOS/macOS, restart the device, and verify no other Bluetooth headphones are interfering. If the mic works across multiple devices, the EarPods are likely fine.
Can a low battery on my iPhone affect my EarPods microphone?
Yes. When your iPhone battery drops below 10%, iOS may throttle accessory power or disable certain ports, interrupting microphone detection. Additionally, using a damaged or non-Apple Lightning cable can cause inconsistent power delivery. Charge your device above 20% and use an official Apple cable to rule out power-related issues.
When should I replace my EarPods instead of troubleshooting?
If the mic remains silent after cleaning, updating software, checking permissions, and testing on multiple devices, internal cable damage is likely. Physical kinks, fraying, or sound cutting in and out during flex tests indicate hardware failure. Unfortunately, wired EarPods aren’t repairable; replacement is the only solution. Contact Apple Support if within warranty.
Read More:
- Microphone Not Working (Here’s the Quick and Easy Fixes that Work)
- Acer Nitro 5 Microphone Not Working (Start With These Quick Fixes)
- Beats Microphone Not Working (Here’s the Quick Fix Guide that Work)
- Earbuds Microphone Not Working (Here’s the Quick Fix Guide)
- External Microphone Not Working (Quick DIY Fixes That Works)

Susan is a professional writer. She has been a writer for eight years and has always been so fulfilled with her work! She desires to share helpful, reliable, and unbiased information and tips about tech and gadgets. She hopes to offer informative content that can answer users’ questions and help them fix their problems.