
You’re seconds away from going live, your camera’s rolling, and your overlays look pristine. But when you glance at OBS Studio’s audio mixer, your microphone meter sits frozen at silence, no green bars, no movement, nothing.
When your OBS microphone not working error strikes, the problem typically stems from one of four causes: incorrect Global Audio Device or Audio Input Capture source selection, OS-level microphone privacy permissions blocking access, sample rate mismatches between your device (44.1 kHz) and OBS (48 kHz), or exclusive mode conflicts in Windows Sound Control Panel that prevent OBS from capturing your mic signal.
This troubleshooting guide walks you through every critical checkpoint, from verifying audio device settings and Windows/macOS permissions to fixing filter configurations, driver conflicts, and sampling rate errors, so you can restore crystal-clear microphone audio and get back to streaming without delays or panic.
Key Takeaways
- The four primary causes of OBS microphone not working are incorrect audio device selection, OS-level permission blocks, sample rate mismatches (44.1 kHz vs. 48 kHz), and exclusive mode conflicts that prevent OBS from capturing your mic signal.
- Verify Windows/macOS microphone permissions in Privacy & Security settings and explicitly select your physical microphone device (not ‘Default’) in OBS Settings → Audio to restore audio capture.
- Disable exclusive mode, audio enhancements, and aggressive OBS audio filters (Noise Gate, Noise Suppression) that may clamp your microphone signal to zero and prevent green bars from appearing in the mixer.
- Update or reinstall audio drivers through Device Manager or manufacturer control panels, as outdated drivers are a top cause of silent microphone issues during streaming.
- Implement a pre-stream checklist—verify OBS mixer green bars, confirm unmuted tracks in Advanced Audio Properties, check privacy permissions, and test a 10-second recording—to prevent 99% of live microphone failures.
- If troubleshooting fails, reset OBS to factory defaults by renaming the global.ini file, then run the Auto-Configuration Wizard to regenerate clean audio settings and eliminate corrupted configurations.
Why Your OBS Microphone Isn’t Working
OBS Studio routes audio through two primary pathways: the Global Audio Devices panel (Settings → Audio) and individual Audio Input Capture sources added per scene. When your mic fails, it’s usually because OBS can’t access the physical device, the operating system blocks permission, or conflicting software claims exclusive control.
Windows 11 and macOS Ventura introduced stricter microphone privacy controls. If you’ve never granted OBS permission, the app literally can’t “see” your USB condenser or XLR interface, even if it appears in the dropdown. Sample rate mismatches create another silent killer: your Blue Yeti runs at 44.1 kHz while OBS expects 48 kHz, causing the meter to flatline.
According to OBS Studio’s official troubleshooting documentation, roughly 60% of “no mic audio” support tickets trace back to misconfigured global devices or muted tracks in Advanced Audio Properties. The remaining cases split between driver conflicts and filter chains, especially aggressive Noise Gate or Noise Suppression settings that clamp your signal to zero.
Check Your Audio Device Settings in OBS
Open Settings → Audio and inspect your Mic/Auxiliary Audio dropdown. If it reads “Disabled” or shows a generic “Default,” OBS won’t capture anything. Click the dropdown and explicitly select your microphone’s name, “Blue Yeti,” “Elgato Wave:3,” or “Realtek HD Audio.”
- Navigate to Settings → Audio
- Set Mic/Auxiliary Audio to your physical device (not Default)
- Leave Desktop Audio on a separate track
- Click Apply, then OK
Next, right-click the mixer panel and open Advanced Audio Properties. Scan the Mute column, if your microphone row shows a red speaker icon, click it to unmute. Check that at least one track (Track 1) is enabled so OBS actually records the signal.
“My mic was set to Default instead of the actual USB name. Switched it in Settings → Audio and boom, green bars everywhere.” via r/obs
If you’re using an Audio Input Capture source instead of the global slot, double-click the source, confirm the Device dropdown matches your mic, and verify Use device timestamps is checked.
Verify Windows Sound Settings and Permissions
Windows 11 requires explicit app-level microphone permission. Press Win + I, navigate to Privacy & security → Microphone, toggle Microphone access to On, then scroll down and ensure OBS Studio (or obs64.exe) is also toggled On. Without this, OBS can’t see or capture any mic input.
Open Control Panel → Sound → Recording tab. Right-click your microphone, select Properties → Advanced, and note the Default Format sample rate. If it’s set to 44100 Hz (44.1 kHz) but OBS runs at 48000 Hz (48 kHz), you’ll get silence or stuttering.
On macOS, open System Settings → Privacy & Security → Microphone and tick the checkbox next to OBS or OBS Studio. If OBS doesn’t appear, launch it once to trigger the permission prompt, then approve access.
For USB microphones, check Device Manager → Audio inputs and outputs. If you see a yellow exclamation mark or “USB Audio Device” instead of the brand name, the driver may be corrupted or missing. Unplug the mic, wait 10 seconds, reconnect, and let Windows reinstall the driver automatically.
Adjust Microphone Properties and Levels
In Control Panel → Sound → Recording, right-click your mic and select Properties → Levels. If the slider sits at zero or the speaker icon shows a red slash, unmute it and drag the slider to 80–100. Click Apply.
Switch to the Listen tab and uncheck “Listen to this device.” Enabling playback-through can create feedback loops or conflicts that mute OBS capture. Under the Advanced tab, confirm Allow applications to take exclusive control of this device is unchecked, exclusive mode lets one app hog the mic, blocking OBS entirely.
For XLR setups through audio interfaces (Focusrite Scarlett, PreSonus AudioBox), open the manufacturer’s control panel (Focusrite Control, Universal Control) and verify phantom power (+48V) is enabled for condenser mics. Check that the input gain knob isn’t cranked to zero and the Direct Monitor switch is off to prevent latency or silent monitoring.
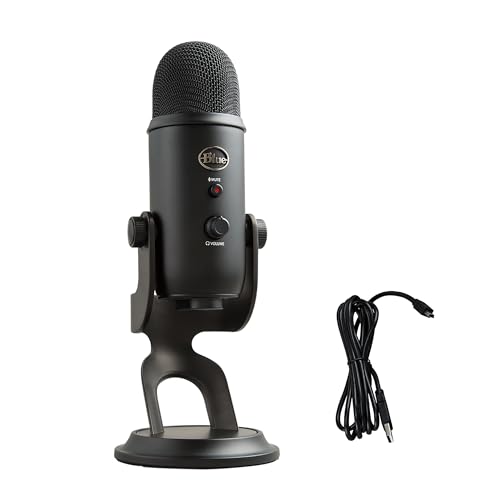
If you’re using a Blue Yeti USB microphone, rotate the gain knob on the back to the 12 o’clock position, set the pattern switch to cardioid, and press the mute button (red LED off) before launching OBS.
Update or Reinstall Audio Drivers
Outdated or corrupted drivers are a top cause of silent mics. Press Win + X → Device Manager → Audio inputs and outputs, right-click your microphone, and select Update driver → Search automatically for drivers. Windows will fetch the latest version from its catalog.
For dedicated interfaces, download drivers directly from the vendor: Focusrite support, PreSonus downloads, or Elgato Wave Link. Install the .exe or .dmg, restart your PC or Mac, then relaunch OBS.
If updating fails, try a clean reinstall. In Device Manager, right-click the microphone, select Uninstall device, check Delete the driver software for this device, and click Uninstall. Reboot your system, Windows or macOS will detect the hardware and install a fresh driver on startup.
On macOS, reset the Core Audio daemon by opening Terminal and typing sudo killall coreaudiod, then press Enter and enter your password. This clears cached audio routing and often fixes “mic not showing up” glitches in OBS.
Disable Exclusive Mode and Audio Enhancements
Right-click the speaker icon in the system tray, select Sounds → Recording, right-click your microphone, and choose Properties. Under the Advanced tab, uncheck both “Allow applications to take exclusive control of this device” and “Give exclusive mode applications priority.” Click Apply.
Switch to the Enhancements tab (if present). Check Disable all enhancements or Disable all sound effects, then Apply. Windows audio enhancements, like “Acoustic Echo Cancellation” or “Microphone Boost”, can conflict with OBS filters, causing clipping, distortion, or complete silence.
For Realtek HD Audio users, open the Realtek Audio Console (search in Start menu). Navigate to Microphone → Device advanced settings and turn off “Noise Suppression,” “Echo Cancellation,” and “Room Correction.” These DSP layers add latency and can block OBS from receiving raw PCM audio.
If you run third-party audio management software like Nahimic, Sonic Studio, or Dolby Atmos, temporarily disable or uninstall it. These apps insert virtual drivers that intercept your mic signal before OBS can capture it, leading to “device busy” or “no sound” errors.
Configure OBS Audio Filters Correctly
In the OBS audio mixer, click the gear icon next to your microphone and select Filters. If you see Noise Suppression or Noise Gate, their settings might be too aggressive, clamping your voice to zero decibels.
For Noise Gate, set Close Threshold to around –50 dB and Open Threshold to –40 dB. If the thresholds are inverted or both set to –60 dB, the gate never opens, silencing your mic entirely. Adjust Attack Time to 10 ms and Release Time to 150 ms for smooth transitions.
For Noise Suppression (RNNoise or Speex), try toggling it off temporarily. Heavy suppression can mistake soft speech for background noise, especially with budget USB mics. If you need noise reduction, use the RNNoise method at –30 dB instead of the legacy Speex filter.
Add a Gain filter if your levels are too low. Click the + icon, choose Gain, and raise the slider by +5 to +10 dB. Avoid exceeding +15 dB, or you’ll introduce hiss and clipping. Remove any duplicate filters, stacking multiple Noise Gates or Compressors creates phase issues that mute your signal.
If you’re serious about broadcast-quality audio, consider the dbx 286s Microphone Preamp for hardware compression, de-essing, and gating before the signal even reaches OBS.

Fix Sampling Rate Mismatches
OBS defaults to 48000 Hz (48 kHz) under Settings → Audio → Sample Rate. If your microphone’s Windows properties show 44100 Hz (44.1 kHz), the mismatch causes stuttering, sync drift, or complete silence.
Open Control Panel → Sound → Recording, right-click your mic, select Properties → Advanced, and change Default Format to 2 channel, 16 bit, 48000 Hz (DVD Quality) or 2 channel, 24 bit, 48000 Hz (Studio Quality). Click Apply, then restart OBS.
Alternatively, leave your mic at 44.1 kHz and switch OBS to match: Settings → Audio → Sample Rate → 44.1 kHz. This works if you’re recording locally, but 48 kHz is the broadcast standard for streaming platforms, so aligning your device upward is generally smarter.
For audio interfaces with dedicated control software (Focusrite Control, Universal Control, PreSonus Studio One), open the app and set the Sample Rate to 48 kHz globally. The interface hardware will then lock to that rate, eliminating any software-level conversion or resampling lag.
| Sample Rate | Use Case | OBS Compatibility |
|---|---|---|
| 44.1 kHz | Music production, CD standard | Works but not ideal for streaming |
| 48 kHz | Video, broadcast, streaming | Recommended default |
| 96 kHz / 192 kHz | High-res audio, archival | Unnecessary overhead: stick to 48 kHz |
Resolve Conflicts with Other Recording Software
If Discord, Skype, Zoom, Audacity, or Adobe Audition runs in the background, they can claim exclusive control of your microphone, locking OBS out. Close all communication and DAW apps, then relaunch OBS and test your mic meter.
Some games with built-in voice chat (Valorant, Overwatch 2, Call of Duty) also grab the mic exclusively. Alt-Tab out, mute in-game voice, or disable the game’s audio device in its settings to free up the hardware for OBS.
Virtual audio cables (VB-Audio, Voicemeeter) add another layer of routing. If you’re using Voicemeeter Banana or Potato, confirm your physical mic is routed to Hardware Input 1, Voicemeeter VAIO is set as OBS’s Mic/Auxiliary Audio, and the A1/A2 outputs are configured correctly. A single misrouted cable silences everything.
“Discord was hogging my mic in exclusive mode. Closed it, reopened OBS, and the green bars came back instantly.” via r/Twitch
Check Task Manager → Processes for hidden audio apps (Nvidia Broadcast, RTX Voice, Krisp). Right-click and End task, then restart OBS to reclaim the mic input.
Test with Different Audio Sources
Swap your current mic for another device, your laptop’s built-in mic, smartphone earbuds with a 3.5 mm adapter, or a spare USB headset. If OBS captures the replacement immediately, your original microphone or its cable/interface is faulty.
Try a different USB port. Front-panel USB 2.0 headers can deliver inconsistent power, causing USB mics to enumerate but fail silently. Plug directly into a rear USB 3.0 or USB-C port on your motherboard for stable voltage and grounding.
For XLR setups, test with a different XLR cable and swap the input channel on your interface (Input 1 → Input 2). A loose solder joint in the cable or a blown preamp circuit will silence one channel entirely.
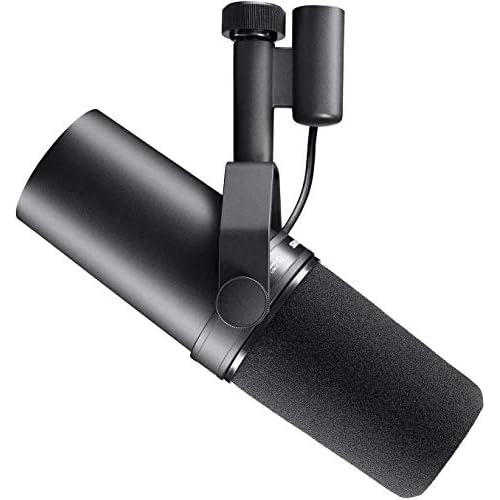
If you’re troubleshooting a Shure SM7B dynamic microphone through a Focusrite or Behringer interface, add a Cloudlifter CL-1 inline preamp, the SM7B needs +60 dB of clean gain, which budget interfaces can’t deliver, resulting in near-silent meters even at maximum input.
Reset OBS Settings to Default
If all else fails, reset OBS to factory defaults. Close OBS, press Win + R, type %appdata%\obs-studio, and press Enter. Rename the global.ini file to global.ini.backup (this preserves your old config). Restart OBS, it will regenerate default settings.
On macOS, navigate to ~/Library/Application Support/obs-studio/ and rename global.ini to global.ini.backup. Launch OBS, run the Auto-Configuration Wizard, and select your microphone fresh.
After the reset, manually re-add your scenes and sources. Go to Settings → Audio, choose your mic again, and confirm the meter moves when you speak. This nuclear option clears corrupted plugin remnants, broken JSON scene collections, and lingering filter chains that cause silent capture.
Before resetting, export your scene collection: Scene Collection → Export. Save the .json file to your desktop. After the reset, import it back via Scene Collection → Import to restore layouts without carrying over broken audio configs.
Prevent Future Microphone Issues in OBS
Lock your Settings → Audio configuration once it’s working. Screenshot your Global Audio Devices panel and Advanced Audio Properties grid. Store these in a “OBS Config Backup” folder so you can restore settings after Windows updates or driver reinstalls.
Enable Settings → General → Automatically record when streaming with separate audio tracks (Track 1 = mic, Track 2 = desktop). If your mic fails mid-stream, you’ll have a backup recording to diagnose whether the issue was OBS, the OS, or the hardware.
Update OBS Studio every 2–3 months via the built-in updater or OBS official downloads. Major releases (28.x → 29.x) often fix ASIO driver bugs, macOS Core Audio regressions, and Windows WASAPI capture glitches.
Keep a spare budget USB mic (Samson Q2U or Audio-Technica ATR2100x) in your drawer. If your main XLR chain fails 10 minutes before a sponsored stream, you can hotswap to USB and go live without missing your window.

Expert Note: Signal engineers at broadcasting facilities run daily "signal path audits", testing each input from preamp to encoder. Adopt a pre-stream checklist: verify OBS mixer green bars, confirm Advanced Audio Properties unmuted, check Windows privacy permissions, and test a 10-second recording. This two-minute ritual prevents 99% of live mic failures.
Frequently Asked Questions
Why is my OBS microphone not working?
OBS microphone issues typically stem from incorrect audio device selection, missing OS-level permissions, sample rate mismatches (44.1 kHz vs. 48 kHz), or exclusive mode conflicts in Windows Sound Control Panel. Check Settings → Audio to confirm your mic is selected, verify Windows privacy permissions grant OBS access, and ensure sample rates align between your device and OBS.
How do I fix OBS microphone not working in Windows 11?
Press Win + I → Privacy & Security → Microphone, toggle access On, then ensure OBS Studio is enabled. Next, open Control Panel → Sound → Recording, right-click your mic, select Properties → Advanced, and set the Default Format to 48000 Hz (48 kHz). Disable exclusive mode under the Advanced tab by unchecking ‘Allow applications to take exclusive control of this device.’ Finally, restart OBS.
What sample rate should I use for OBS streaming?
OBS defaults to 48 kHz (48000 Hz), which is the broadcast standard for streaming platforms. If your microphone is set to 44.1 kHz, change it to 48 kHz in Control Panel → Sound → Recording → Properties → Advanced. Alternatively, adjust OBS Settings → Audio → Sample Rate to match your device, though 48 kHz is recommended for streaming compatibility.
Can other apps prevent my microphone from working in OBS?
Yes. Discord, Skype, Zoom, Audacity, and games with built-in voice chat (Valorant, Overwatch 2) can claim exclusive control of your microphone, locking OBS out. Close all background audio apps and check Task Manager for hidden audio processes like Nvidia Broadcast or Krisp. Once closed, restart OBS to reclaim microphone access.
How do I check if my microphone driver is working properly?
Open Device Manager (Win + X) → Audio inputs and outputs. If you see a yellow exclamation mark or generic ‘USB Audio Device’ instead of your mic’s brand name, the driver is corrupted. Right-click your microphone, select Update driver → Search automatically, and let Windows reinstall it. If updating fails, uninstall the device, check ‘Delete the driver software,’ reboot, and Windows will reinstall it fresh.
Why is my microphone muted in OBS even though it’s on?
Right-click OBS’s mixer panel and open Advanced Audio Properties. Scan the Mute column; if your microphone row shows a red speaker icon, click it to unmute. Also, check Control Panel → Sound → Recording, right-click your mic, select Properties → Levels, and ensure the slider is above zero and the speaker icon shows no red slash. Disable ‘Listen to this device’ to prevent feedback loops.
Read More:
- K9 Wireless Microphone Not Working? Fast Fixes That Actually Work
- Keyboard Microphone Not Working? Here’s How to Fix It in 5 Minutes
- Kenwood Microphone Not Working? 5 Fixes That Actually Restore Your Audio
- Microphone Not Working (Here’s the Quick and Easy Fixes that Work)
- Dell Microphone Not Working (Here’s 11 Easy Solutions)

Susan is a professional writer. She has been a writer for eight years and has always been so fulfilled with her work! She desires to share helpful, reliable, and unbiased information and tips about tech and gadgets. She hopes to offer informative content that can answer users’ questions and help them fix their problems.